Producer Guide · Local Test
Create a Wine Passport
Follow a batch from its first draft to a passport customers can open. Bottle protection and collectibles are optional steps you can set up later.
1. Enter Your Batch Details
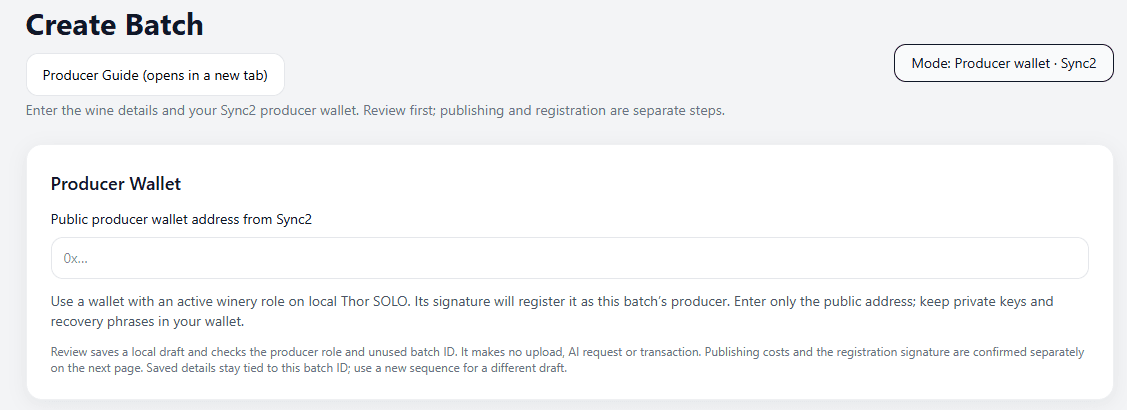
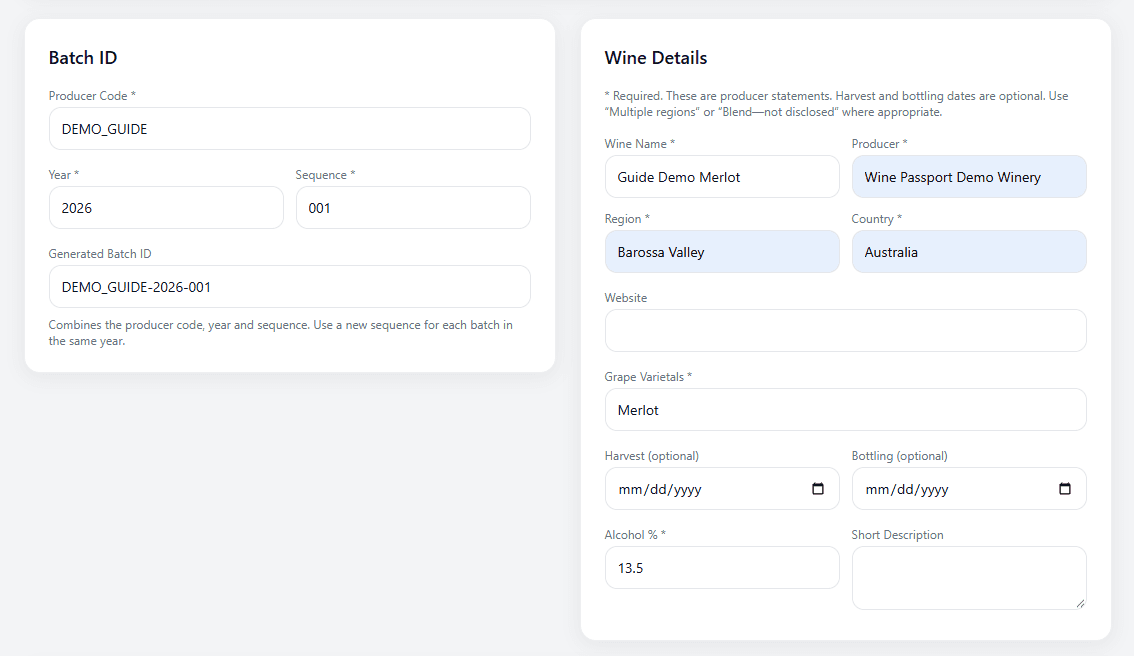
Sign in and open Create Batch. Choose a unique batch ID and complete the fields marked with an asterisk. Harvest and bottling dates are optional. Enter the public address of the Sync2 wallet with an active winery role. Keep the wallet recovery phrase and private key in your wallet.
View Step 1 Screenshots
Enter the public address of your Sync2 producer wallet.
View screenshot · producer wallet
Enter the batch ID components and the wine details.
View screenshot · batch and wine
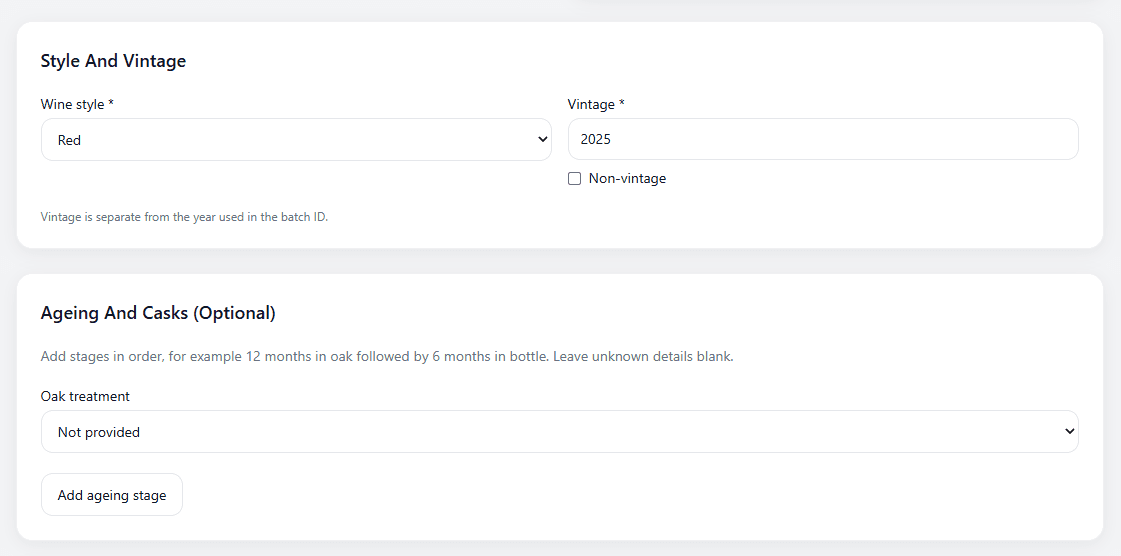
Choose a wine style and vintage. The vintage can differ from the batch ID year.
View screenshot · style and vintage
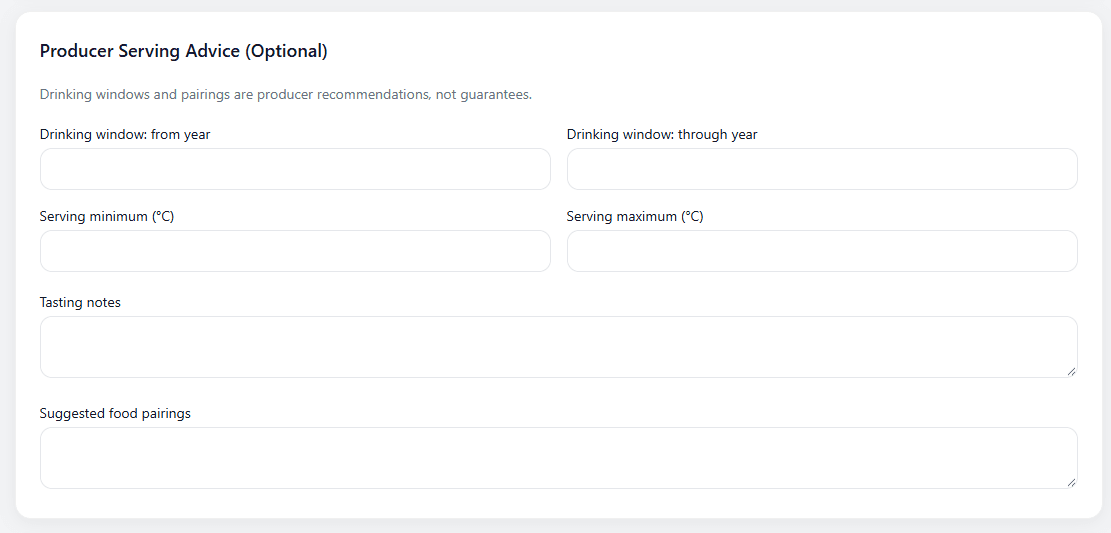
Add serving advice if you have it.
View screenshot · serving advice
Select Review batch (no upload).
View screenshot · review button
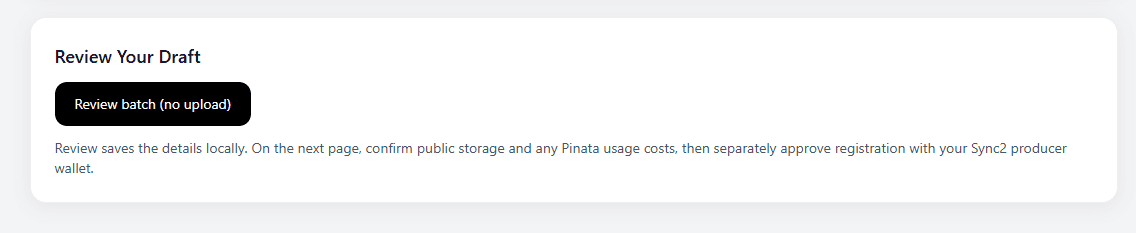
2. Review the Saved Draft
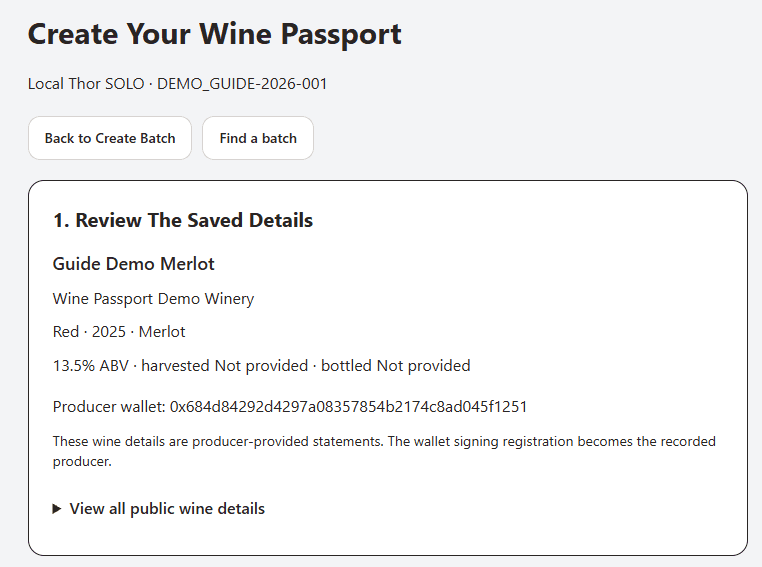
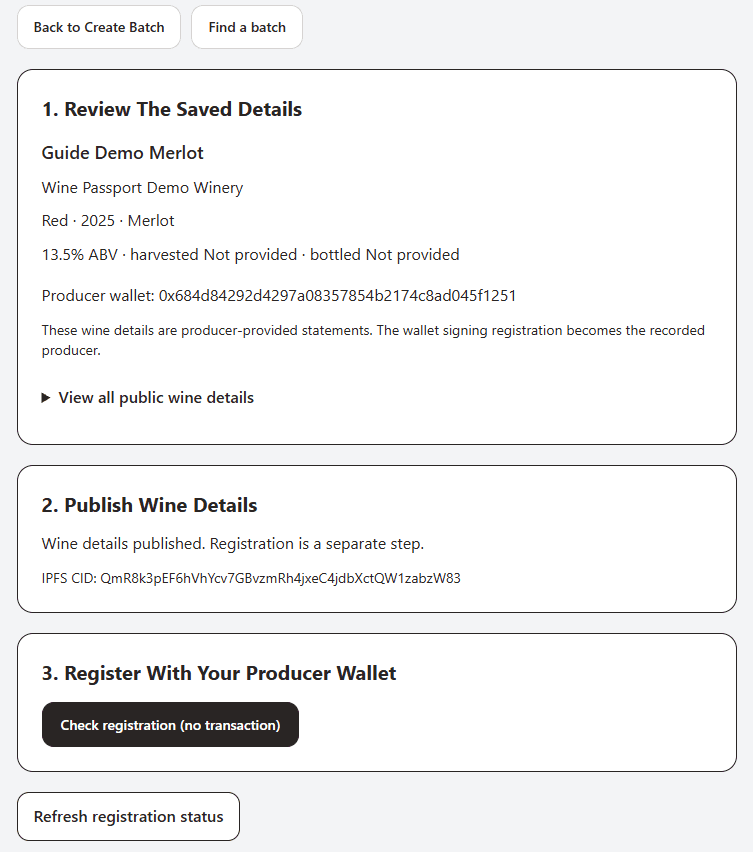
Select Review batch (no upload). This saves a local draft and checks the winery role and batch ID. On the next page, expand View All Public Wine Details and check the spelling, dates, and wine information before publishing.
View Step 2 Screenshots
Check the saved draft and producer address.
View screenshot · saved draft
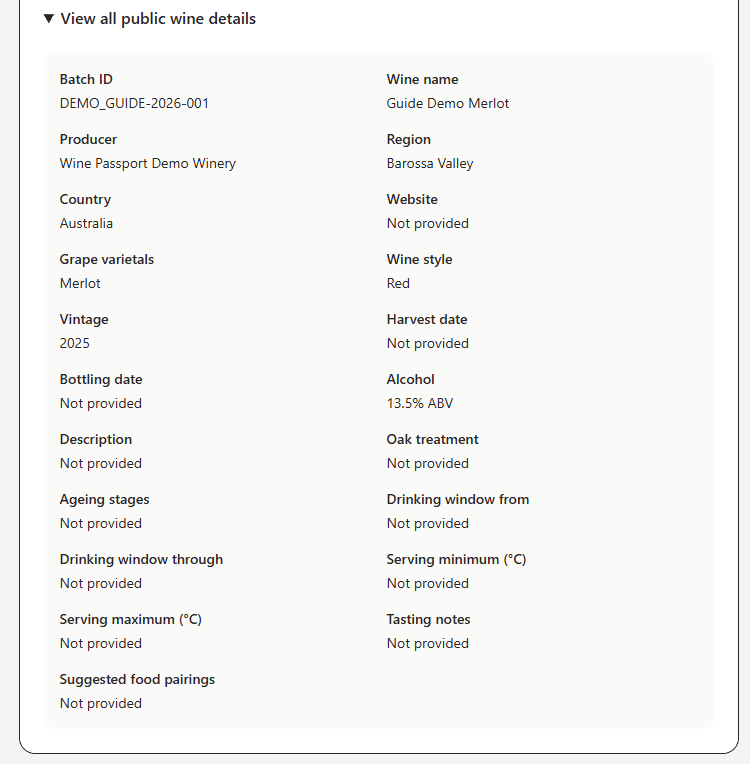
Expand View all public wine details to check what will be published.
View screenshot · public details
3. Publish the Wine Details
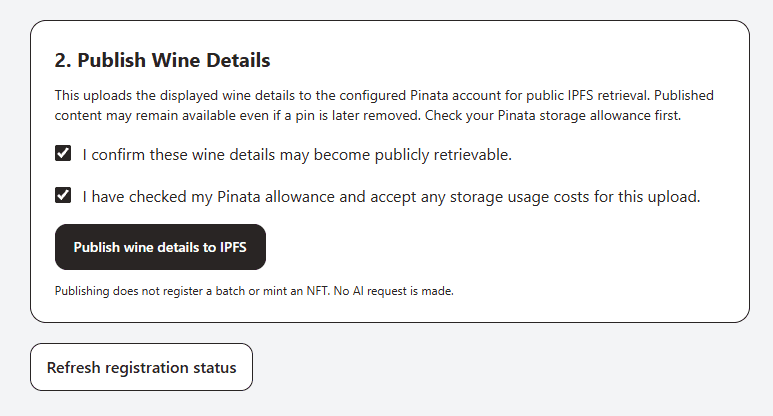
Confirm that the details can be made public and that you accept any storage usage costs under your Pinata plan. Select Publish wine details to IPFS. When publishing finishes, the page shows the IPFS CID, which identifies the published details.
View Step 3 Screenshots
Review both confirmations before publishing to IPFS.
View screenshot · publish controls
After publishing, the IPFS CID appears above the registration controls.
View screenshot · published details
4. Register the Batch in Sync2
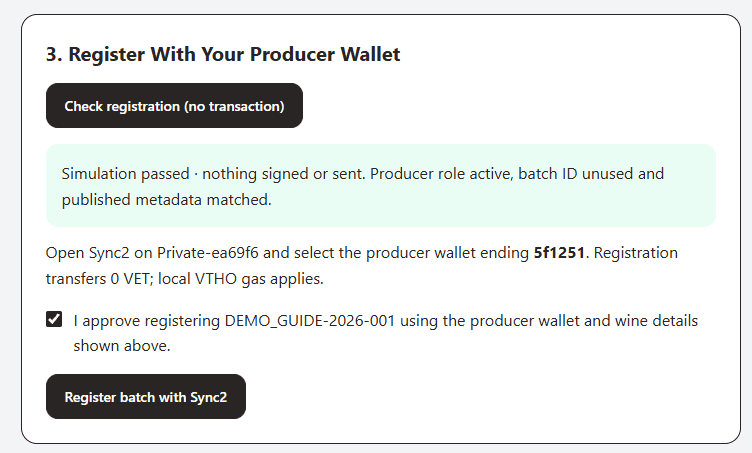
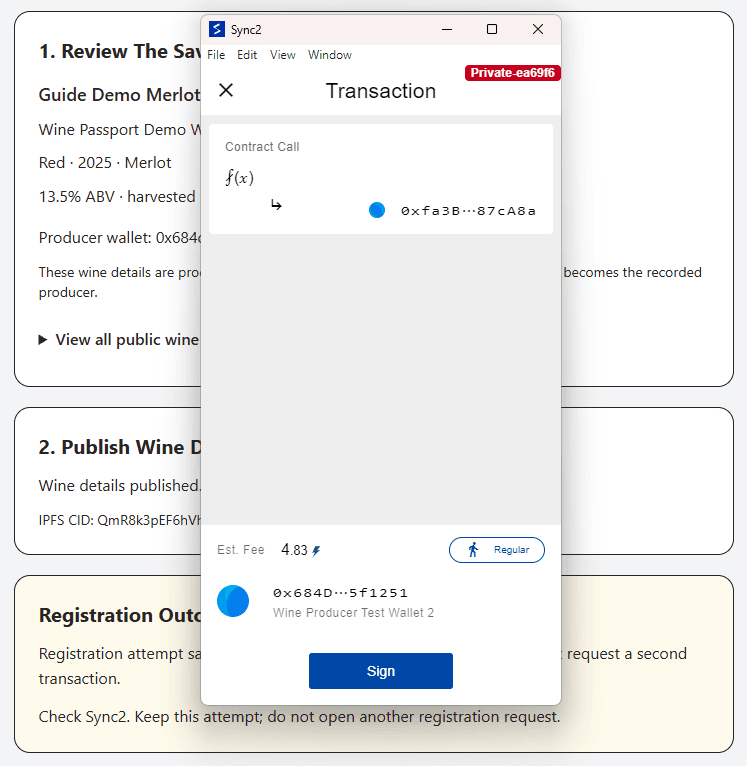
Review the registration and check that Sync2 shows your producer wallet. Sign the registration on the local test network. It transfers zero VET and uses local test VTHO for gas. If the outcome is pending, use Refresh registration status to check the same transaction.
View Step 4 Screenshots
Run the registration check, then review the batch before opening Sync2.
View screenshot · registration check
Example Sync2 prompt on local Thor SOLO. Check the network, signing wallet and estimated fee.
View screenshot · sync2 prompt
5. Open and Check the Passport
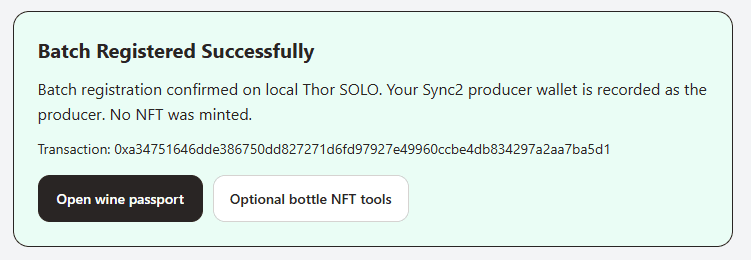
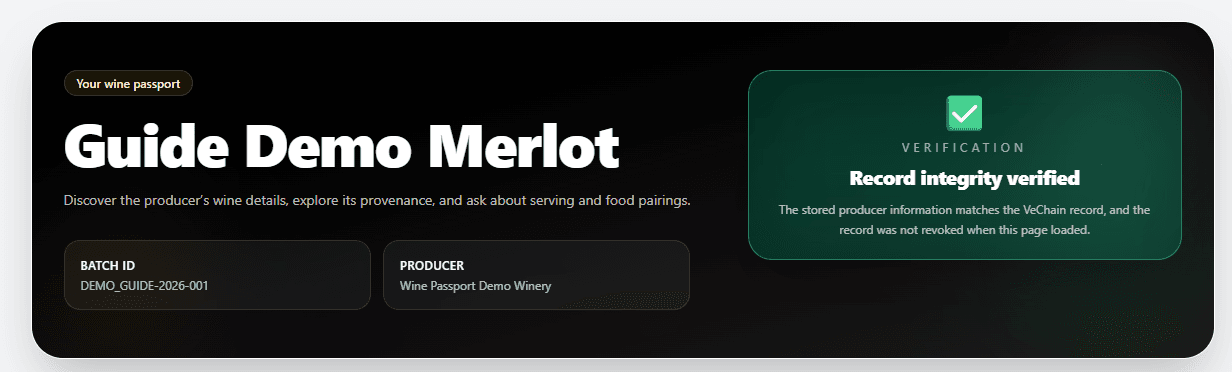
When Batch registered successfully appears, select Open wine passport. Check the batch ID, wine details, and record integrity status. Customers can open the passport without a wallet. The integrity check confirms the retrieved details match the VeChain record, while the wine details are attributed to the producer.
View Step 5 Screenshots
After registration confirms, select Open wine passport.
View screenshot · registration success
Check the wine name, batch ID and Record integrity verified badge.
View screenshot · verified passport
Labels And QR Downloads
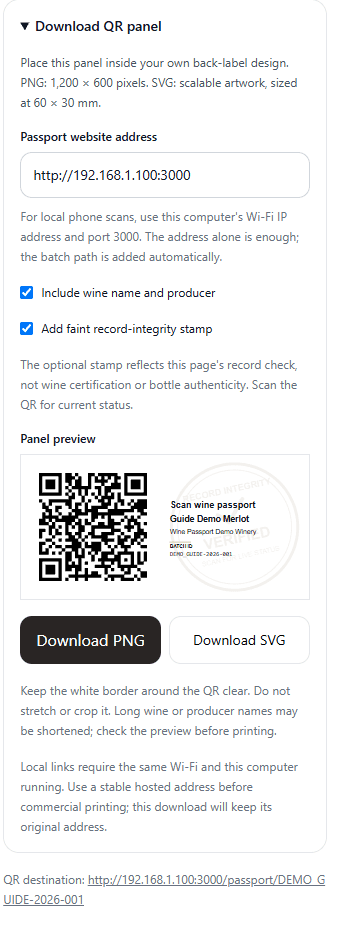
- Open the batch passport and find Producer Label Tools. Expand Download QR panel and enter the website address. For home testing, use this computer’s current Wi-Fi address and port 3000, with the phone on the same Wi-Fi. Localhost only works on the computer running the app.
- Check the destination shown below the panel. The download and both print buttons use this address. Download PNG for a raster image or SVG for scalable artwork. Keep the white border around the QR clear and preserve its proportions.
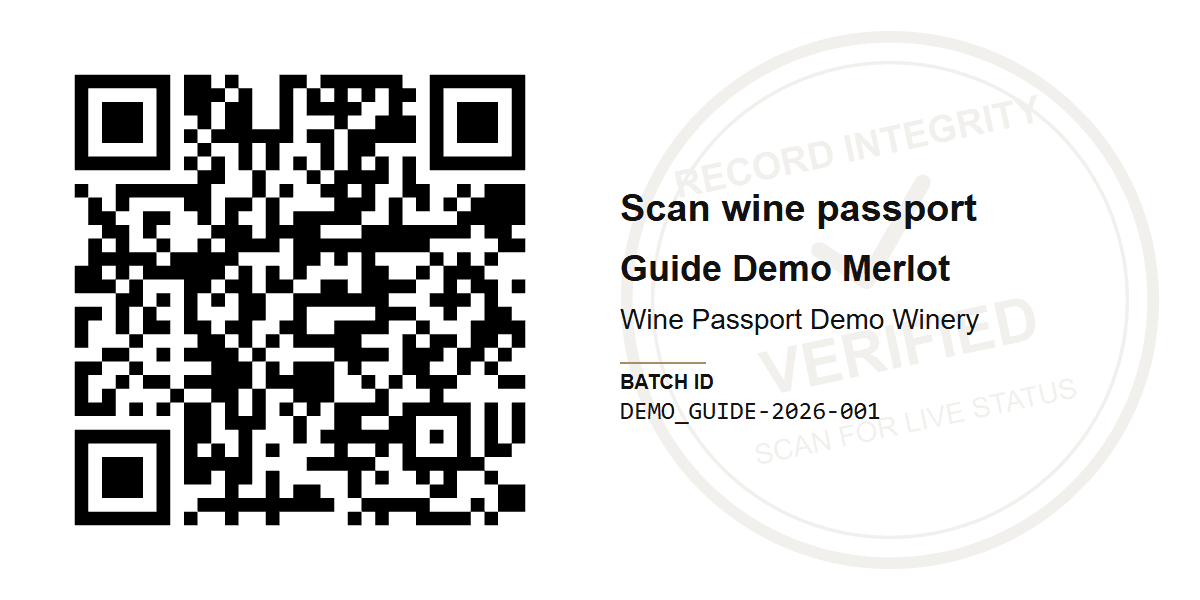
- Scan the downloaded QR with a phone and confirm the batch name and ID. These are batch passport labels; individual bottle protection labels are a separate optional workflow.
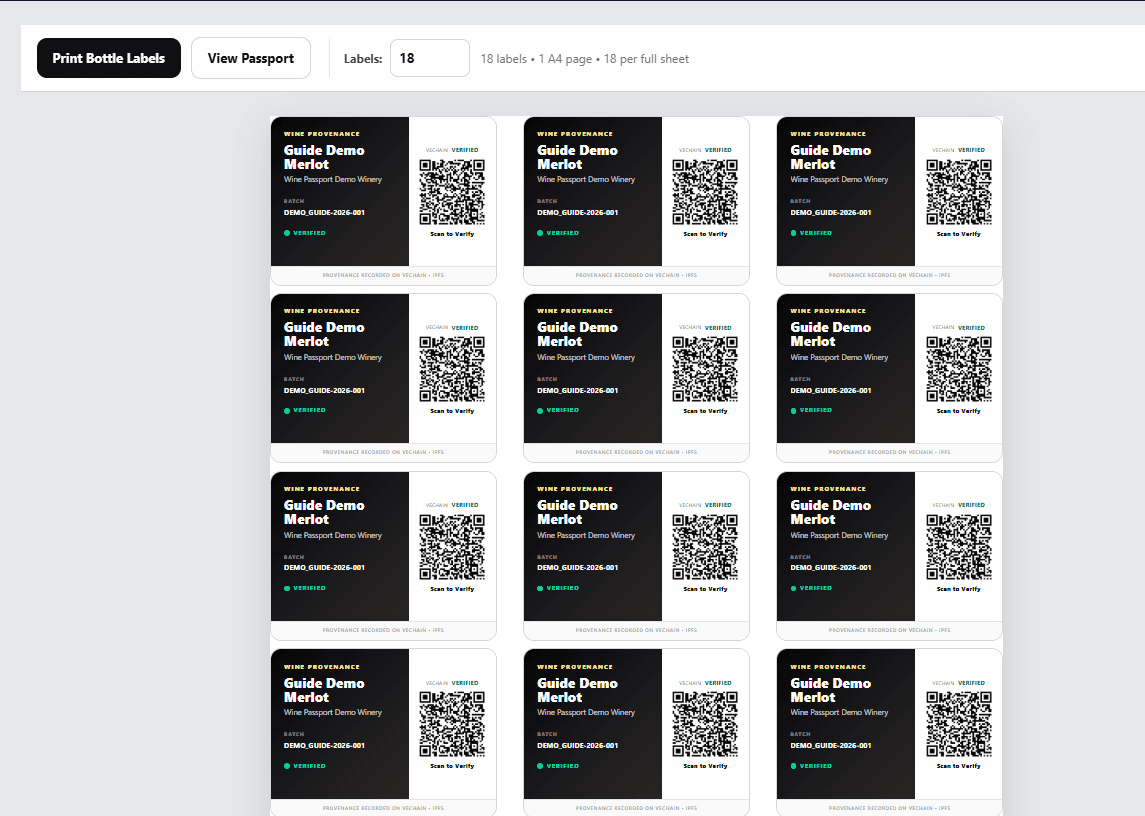
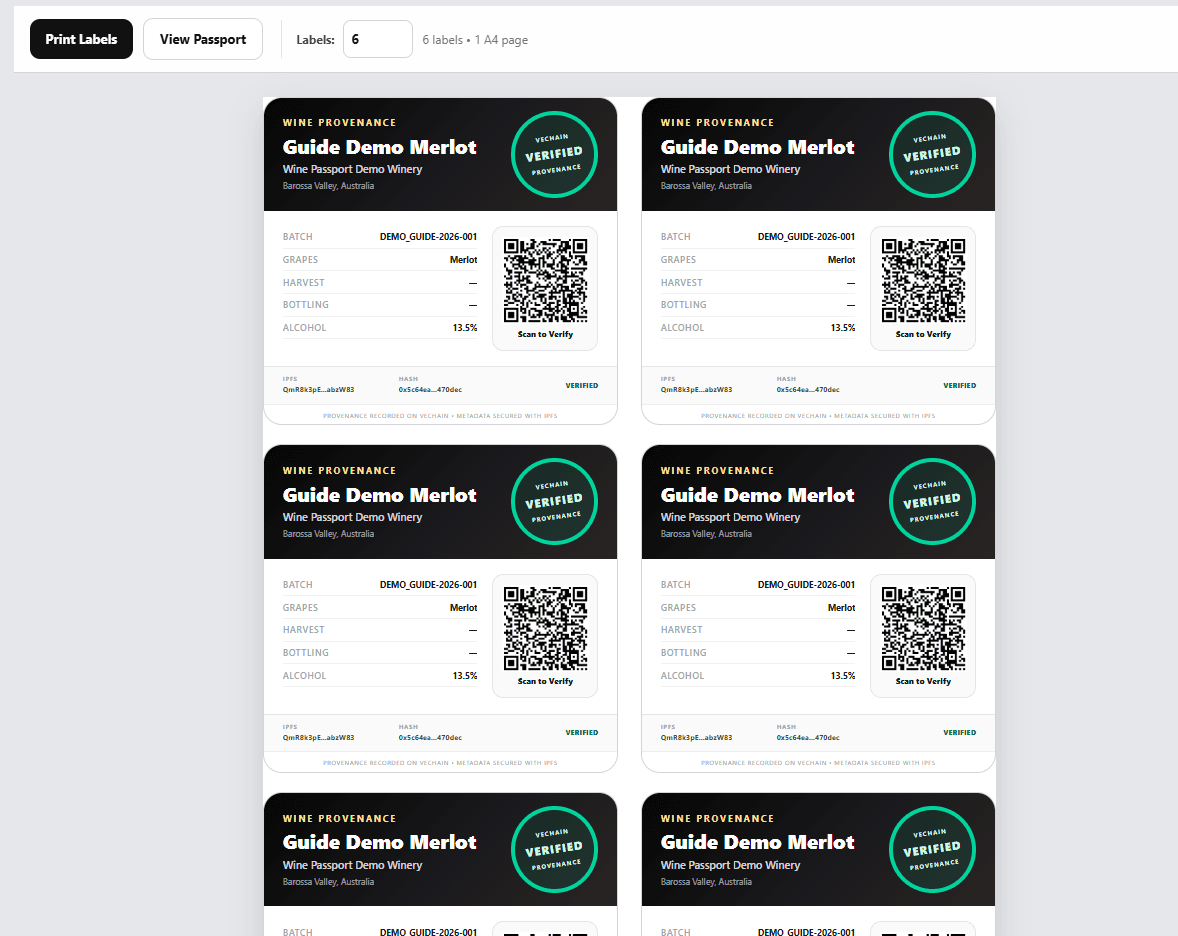
- Choose Print Bottle Labels (60 × 45 mm, 18 per A4 sheet) or Print Large Labels (six per A4 sheet). Set the number of copies, then open the print preview.
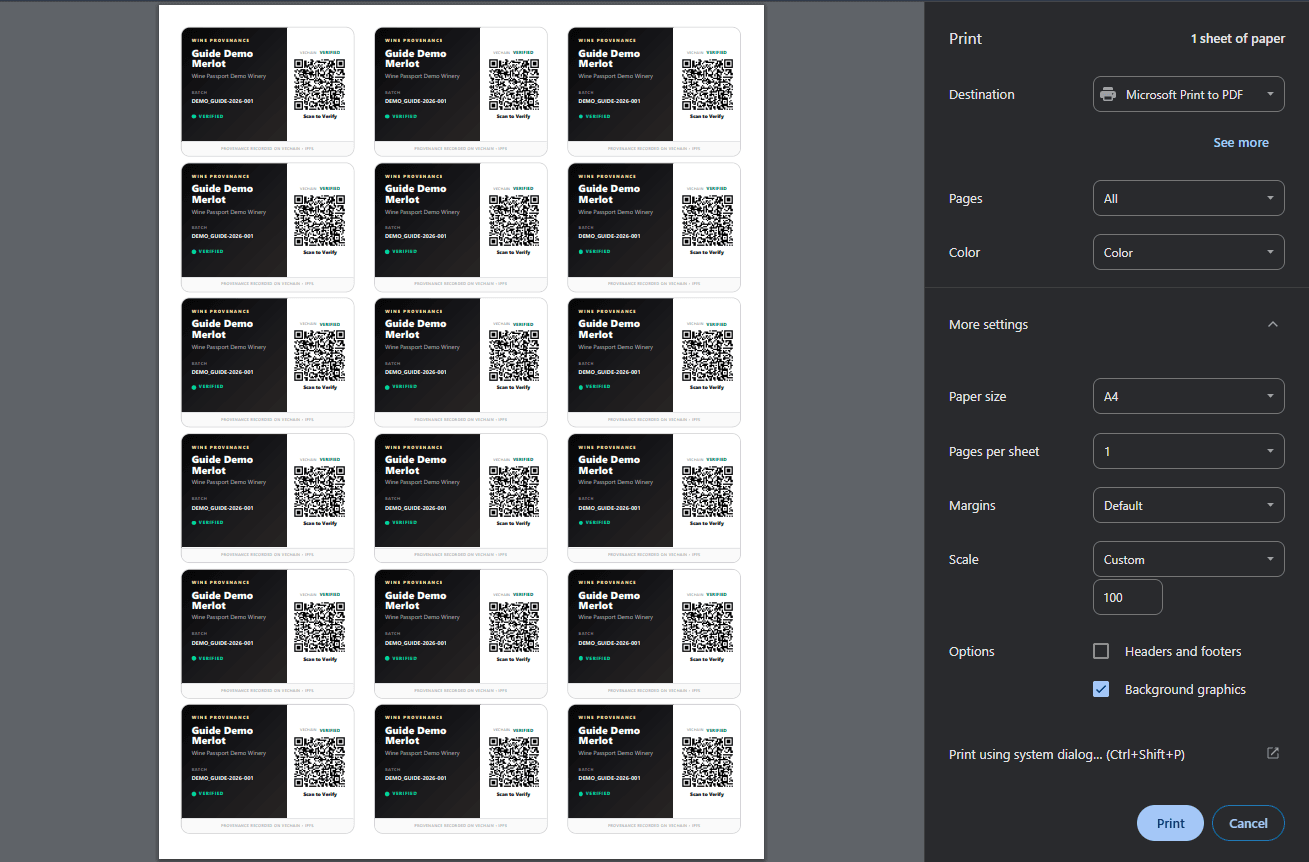
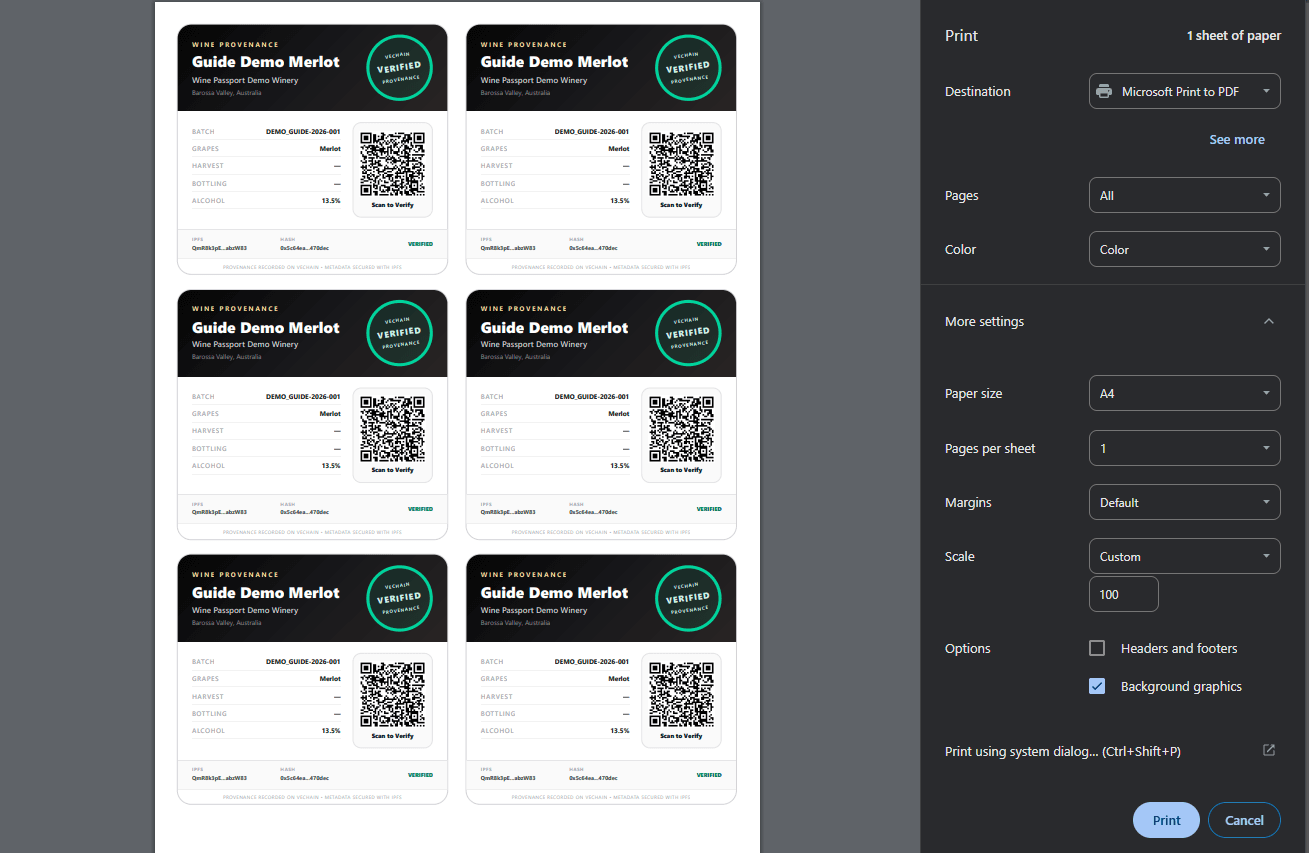
- Select A4, one page per sheet, 100% scale, Default margins, headers and footers off, and background graphics on. Confirm every label fits without clipping. You can use Microsoft Print to PDF without a physical printer.
- Open the saved PDF and scan a QR again. Before printing in quantity, print one physical sheet at actual size, measure the labels and test scanning at the intended size. Alignment with pre-cut label stock and physical print quality still need testing.
Use a stable hosted website address before producing customer labels. Downloaded and printed QR destinations do not change automatically. A record-integrity stamp describes a record check; it does not certify wine quality or physical bottle authenticity.
Local check, 14 November 2026: the downloaded PNG and both saved PDF layouts opened the intended passport on a phone. Physical printing has not yet been tested.
View Label And QR Screenshots
Open Producer Label Tools on the batch passport.
View screenshot · label tools
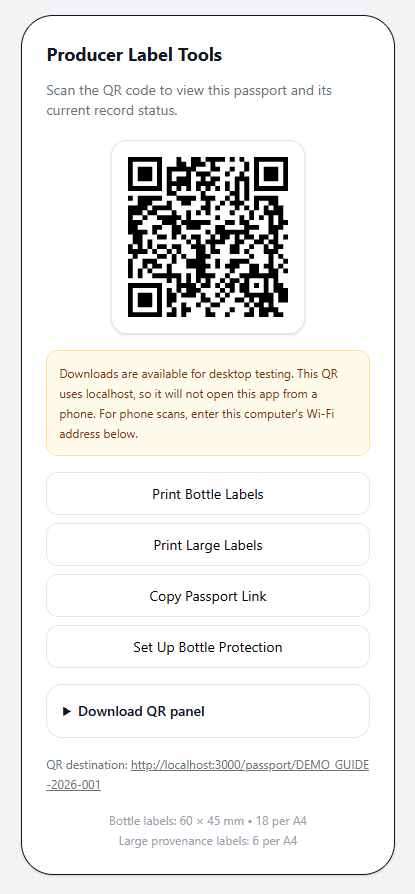
Enter the website address, review the panel and choose PNG or SVG.
View screenshot · qr download settings
Scan the downloaded panel to check that it opens the intended batch.
View screenshot · qr downloaded panel
Choose the number of compact labels; a full A4 sheet holds 18.
View screenshot · compact label sheet
Use A4, one page per sheet, 100% scale, Default margins, headers and footers off, and background graphics on.
View screenshot · compact print settings
Choose Print Large Labels for the six-label layout.
View screenshot · large label sheet
Use the same print settings and confirm all six large labels fit on one A4 page.
View screenshot · large print settings
Offer Bottle NFTs
- Open the verified passport as a producer and select Open Guided Batch Workspace under Bottle NFTs. Open Artwork Studio to choose the generated illustration or save your own permitted custom artwork privately. In Preparation, select Use Saved Custom Artwork if applicable, check the numbered previews and draft files, then use Publishing Review to confirm the quantity and public content.
View Step 1 Screenshots
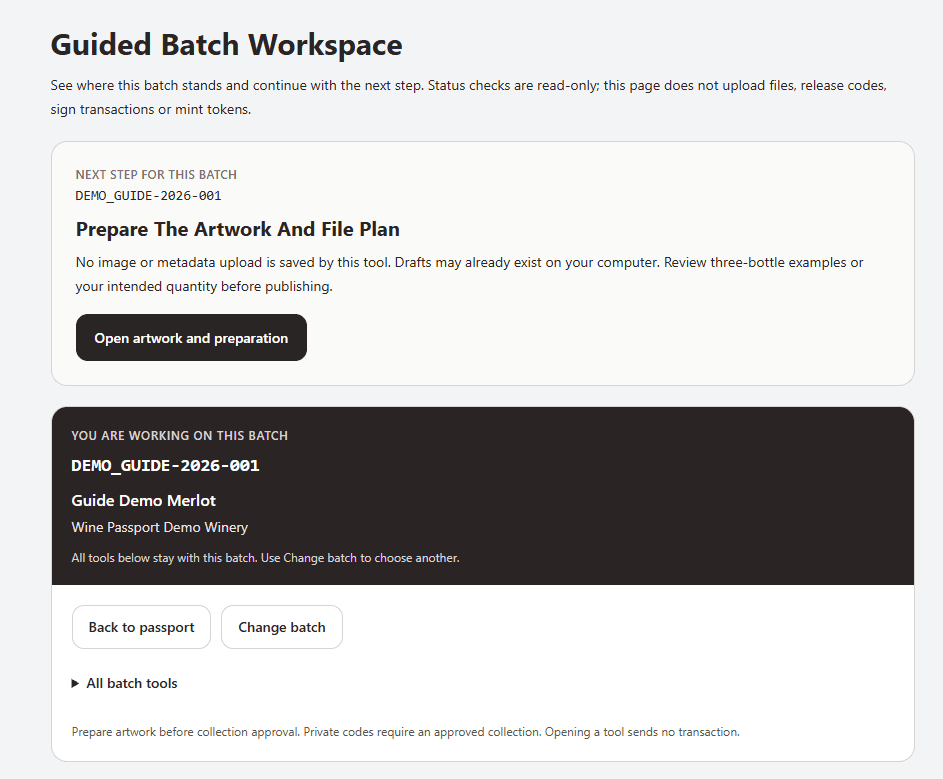
Confirm the batch name, then select Open artwork and preparation.
View screenshot · Guided workspace
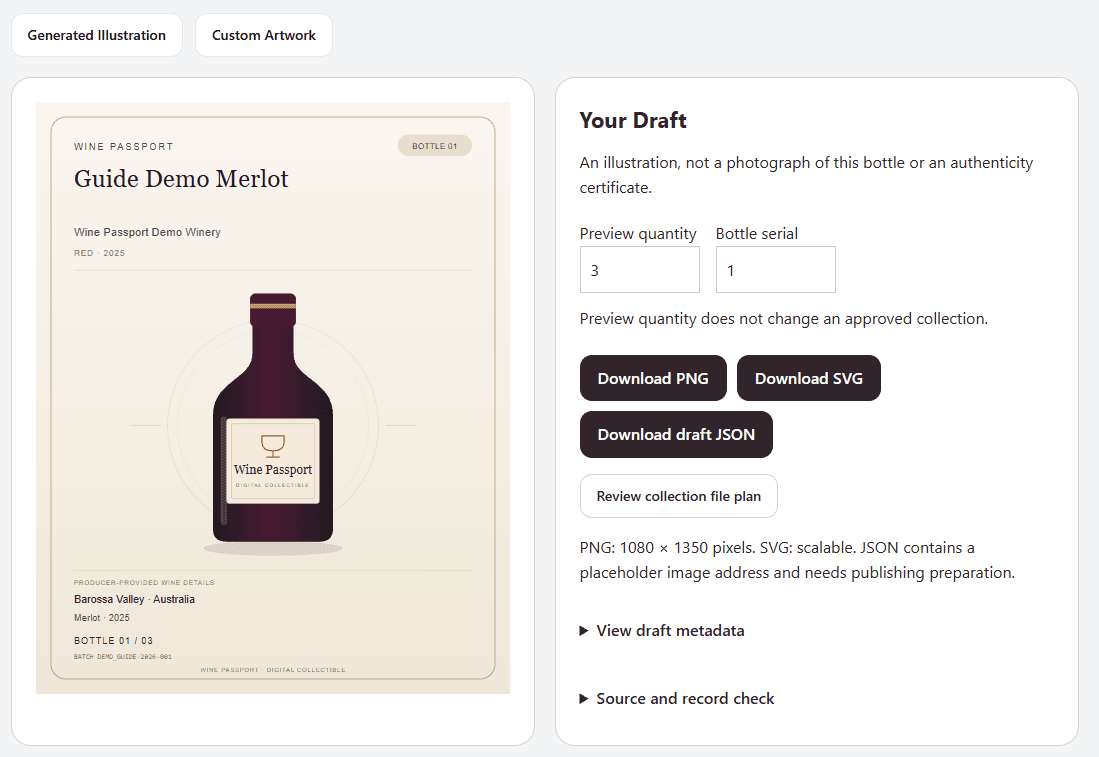
Choose Generated Illustration or Custom Artwork. For a custom image, confirm permission, save the private draft, and load it in Preparation. Check the artwork before continuing to Publishing Review.
View screenshot · Artwork preview
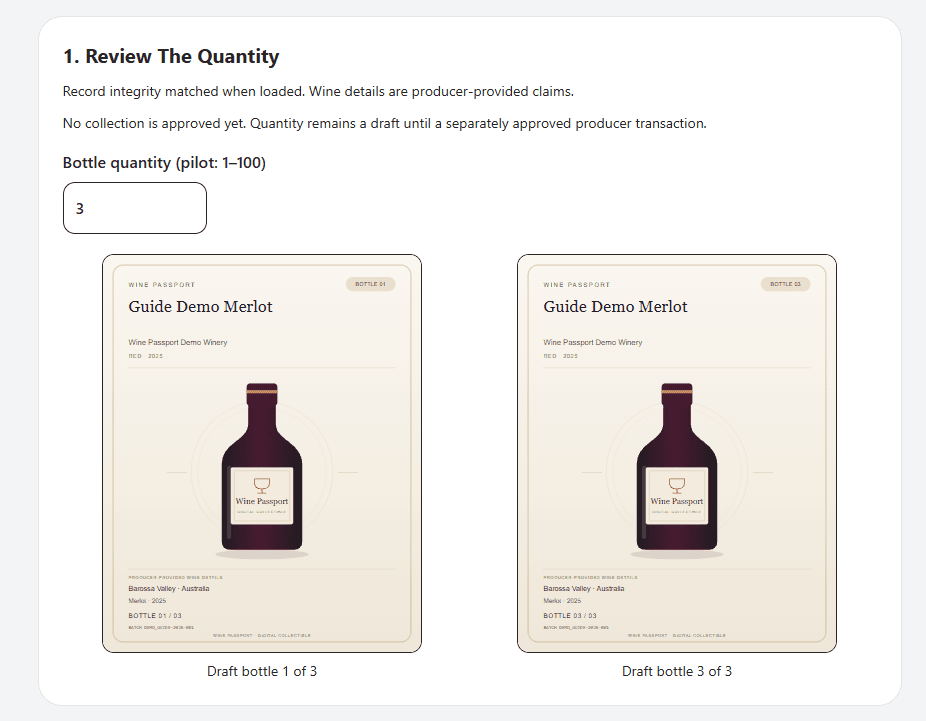
Enter the intended quantity and check the first and last bottle previews.
View screenshot · Bottle quantity
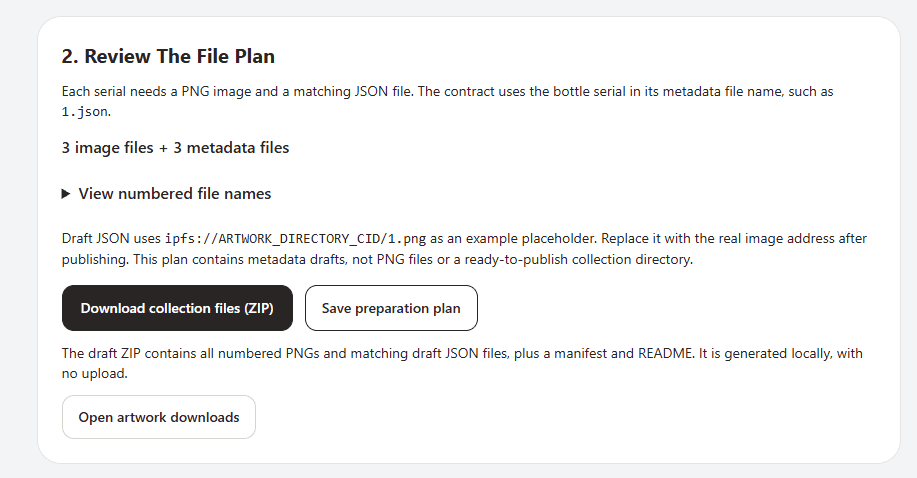
Check that each bottle has a numbered PNG and matching JSON file.
View screenshot · File plan
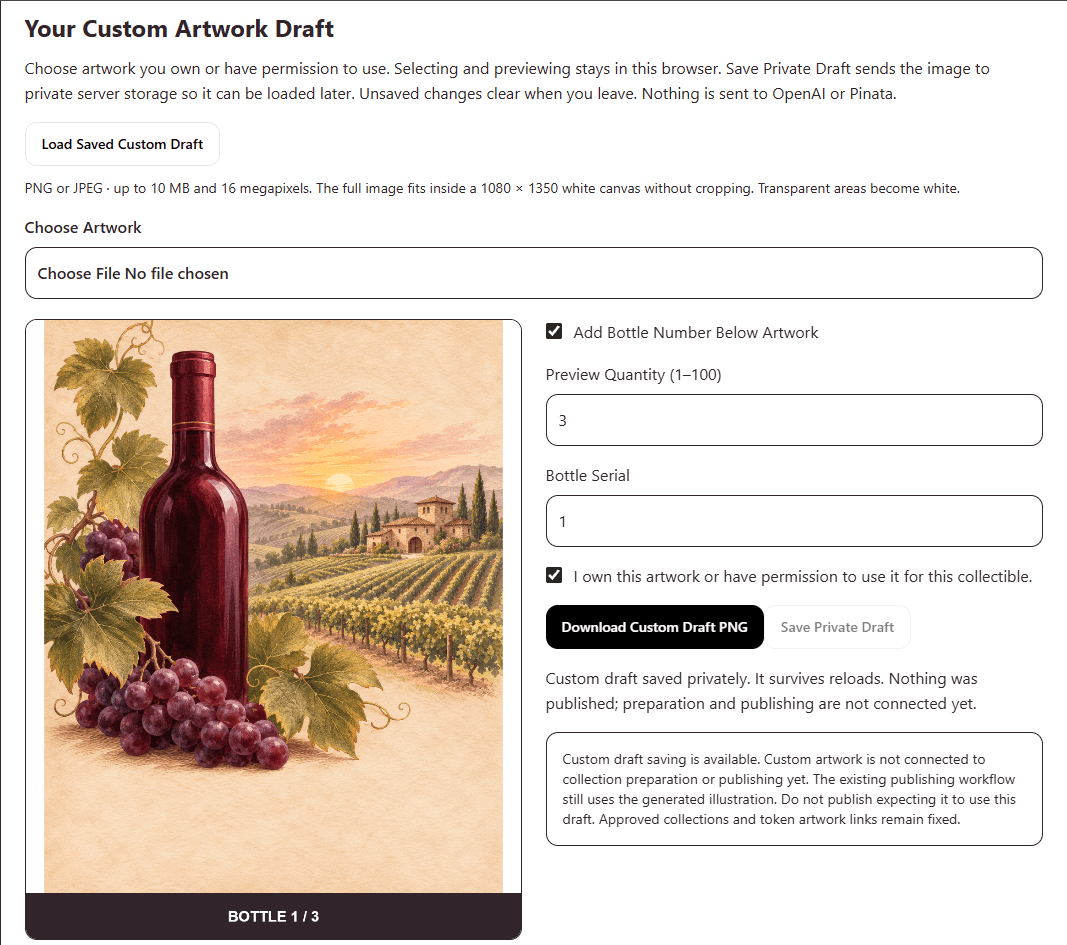
Choose PNG or JPEG artwork you have permission to use, set the quantity and numbering, confirm permission, then select Save Private Draft. The success message confirms private storage; it does not publish the image. This capture predates the publishing connection; follow the custom publishing steps next.
View screenshot · Save The Custom Artwork Privately
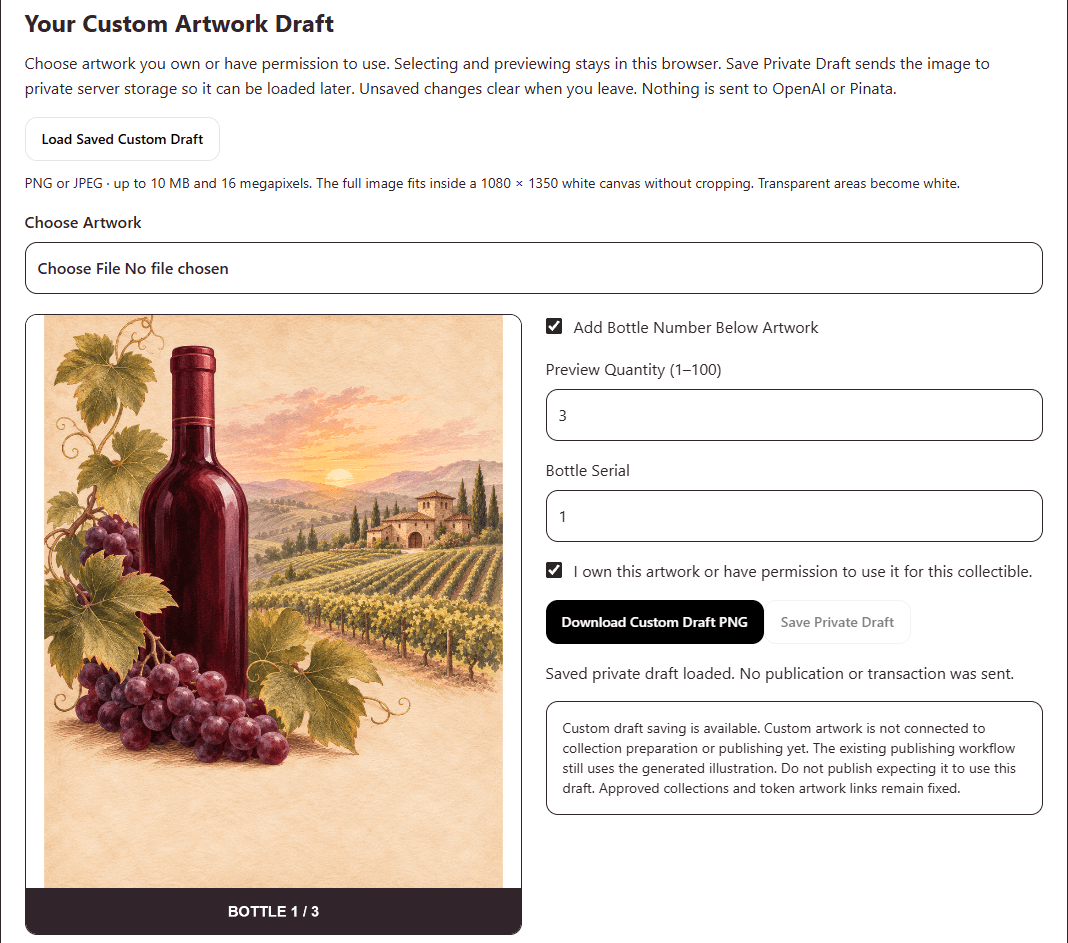
After refreshing, open Custom Artwork and select Load Saved Custom Draft. Check that the image, quantity and numbering return. The pre-connection notice in this earlier capture is superseded by the custom publishing steps next.
View screenshot · Reload The Saved Custom Draft
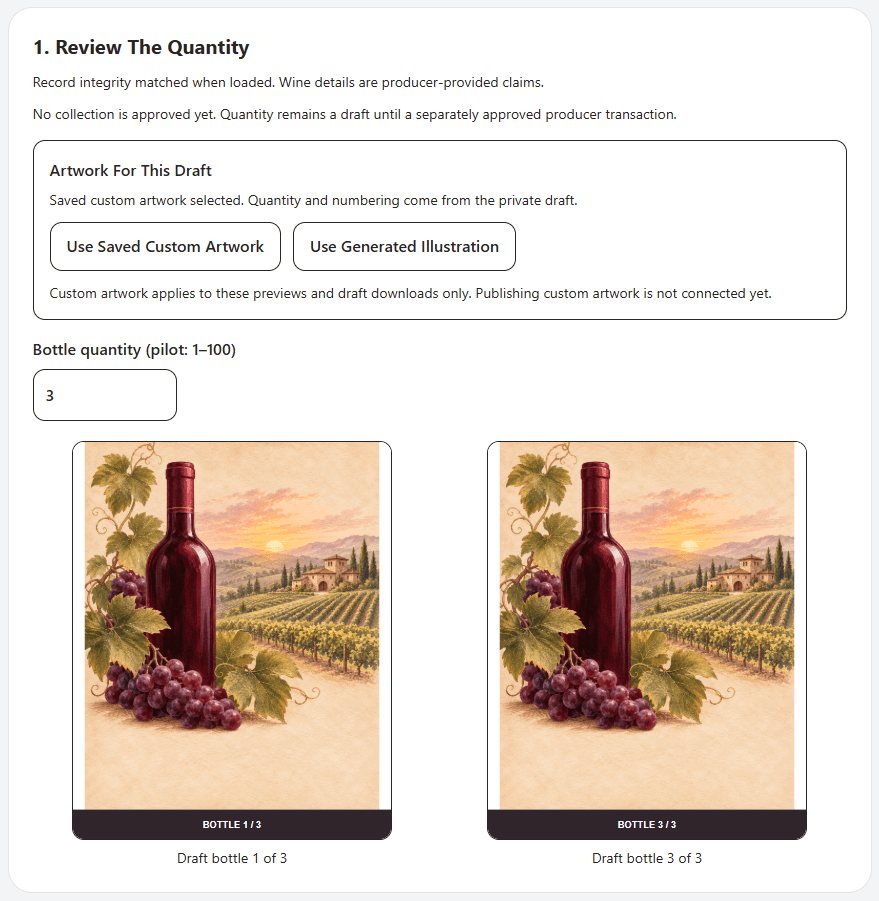
In Preparation, load the batch and select Use Saved Custom Artwork. Check the first and last bottle numbers. Download the draft ZIP if needed and inspect all numbered PNGs. The small notice in this capture predates the publishing connection; the custom publishing flow is shown in the following steps.
View screenshot · Prepare The Custom Artwork
- Publish the artwork images, then publish the bottle metadata. Wait for both verification checks to finish. If retrieval pauses, retry verification of the saved upload to keep the existing files and progress.
View Step 2 Screenshots
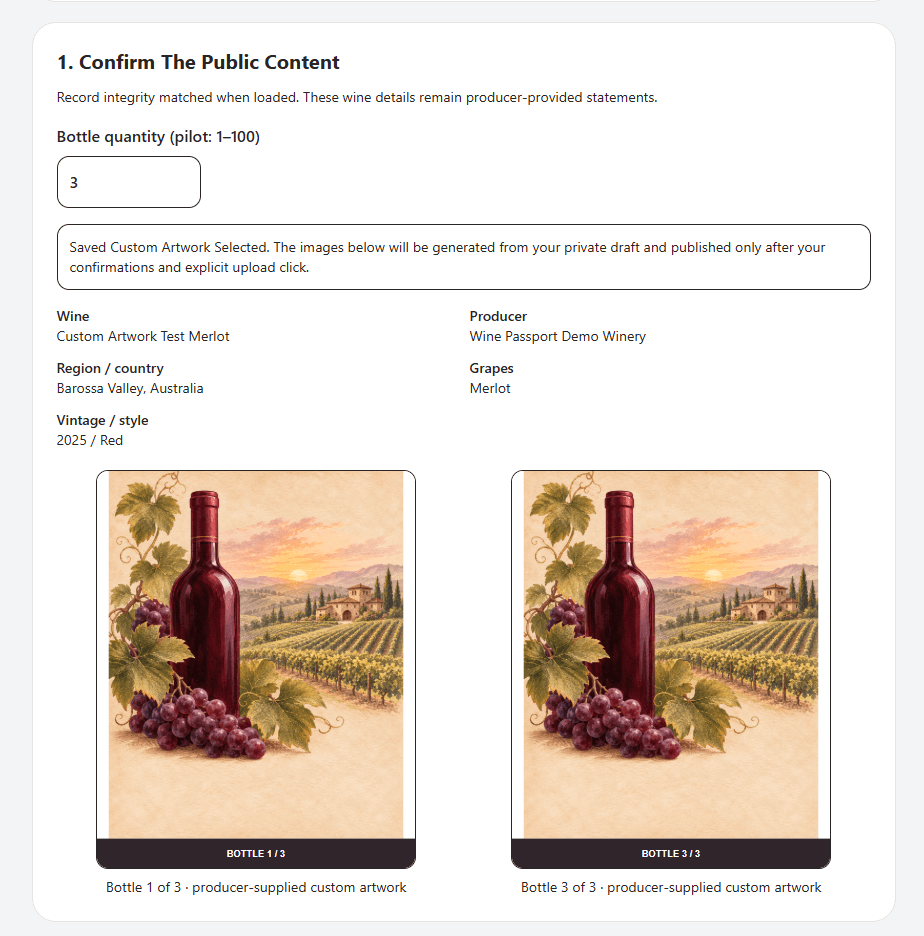
Review the bottle count, wine details and artwork before publishing.
View screenshot · Public content
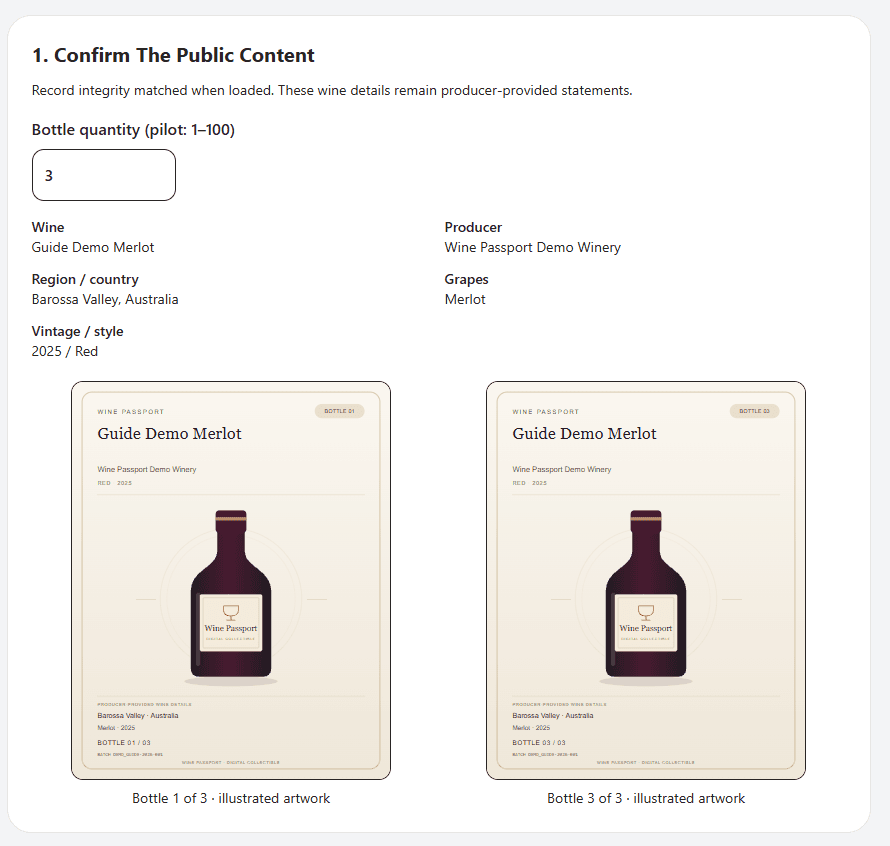
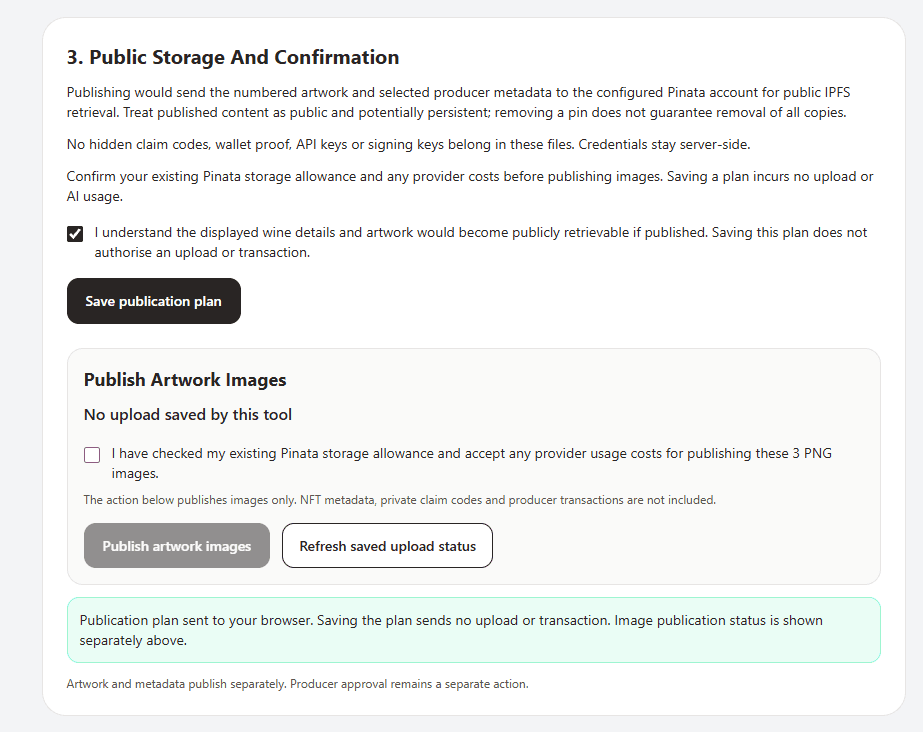
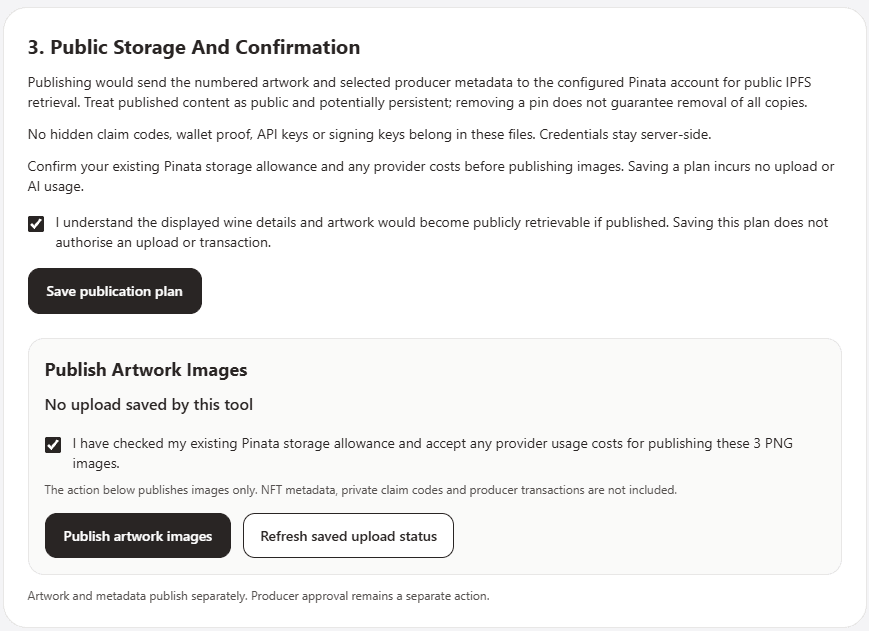
Save the plan, then confirm your storage allowance before publishing the artwork.
View screenshot · Storage confirmation
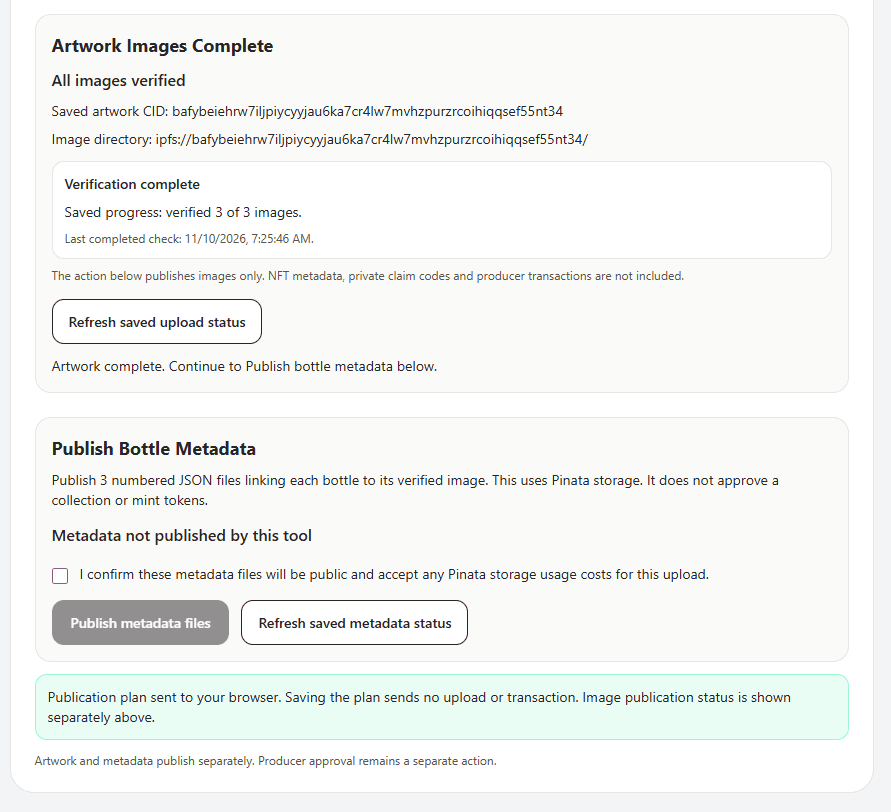
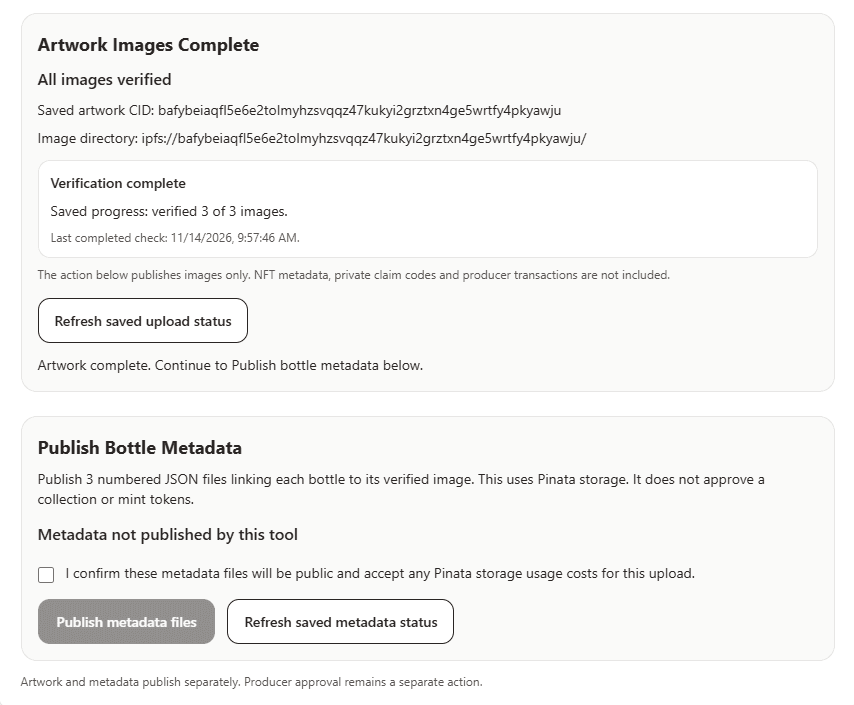
Wait for all images to verify, then review the separate metadata upload confirmation.
View screenshot · Verified artwork
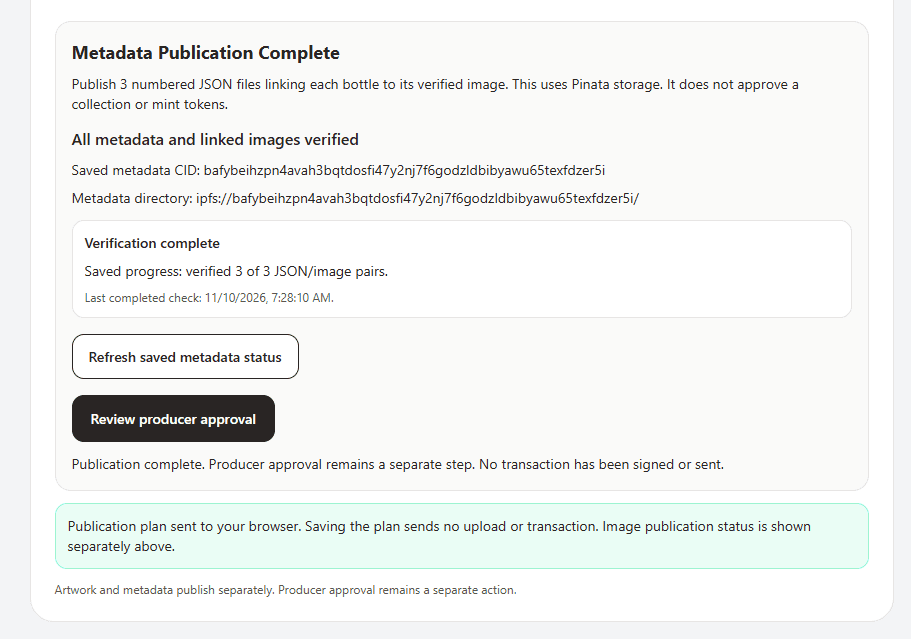
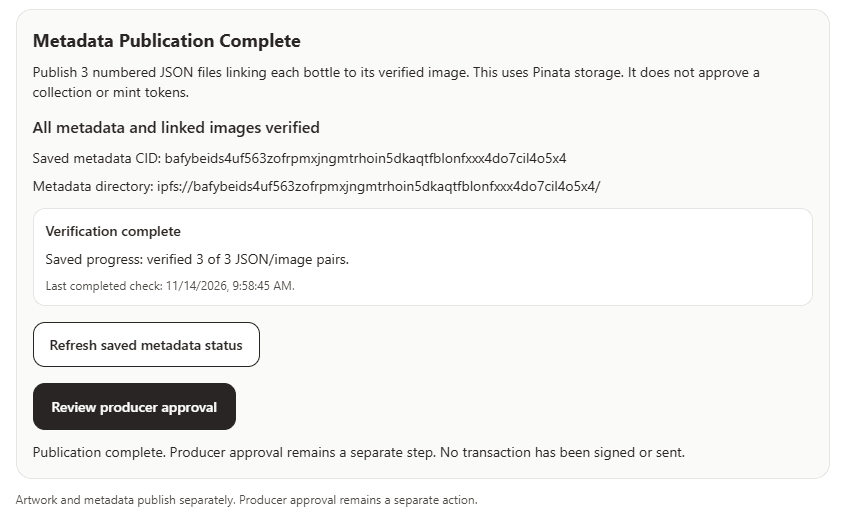
When all JSON and image pairs verify, select Review producer approval.
View screenshot · Verified metadata
Open Publishing Review and load the batch. Confirm Saved Custom Artwork Selected, the correct quantity, and matching first and last bottle previews before uploading.
View screenshot · Review The Custom Public Artwork
Confirm that the displayed content may become public and check your Pinata allowance and storage costs. Click Publish Artwork Images once. Saving the publication plan alone does not upload anything.
View screenshot · Confirm Public Storage And Costs
Wait for all three artwork images to verify. Then review the separate metadata confirmation and select Publish Metadata Files once. If retrieval pauses, retry verification of the saved upload rather than uploading again.
View screenshot · Verify The Custom Images
Confirm all three JSON/image pairs are verified, then select Review Producer Approval. Publication has not approved the collection or minted any NFTs.
View screenshot · Verify The Metadata And Continue
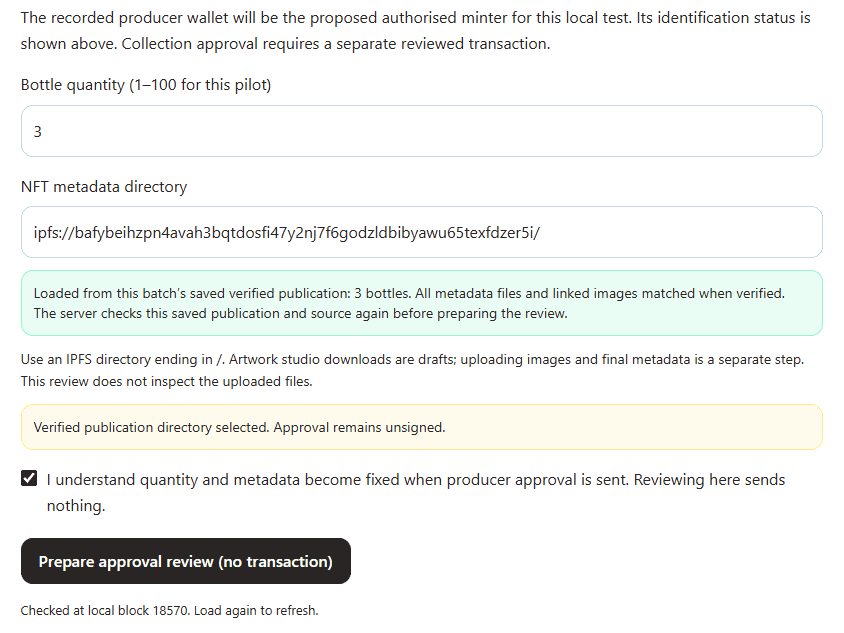
- Select Review Producer Approval. Check the quantity and verified IPFS metadata directory before signing collection approval in Sync2 with the recorded producer wallet. Approval fixes those settings on chain. Minting happens separately.
View Step 3 Screenshots
Compare the quantity and metadata directory with the verified publication.
View screenshot · Collection settings
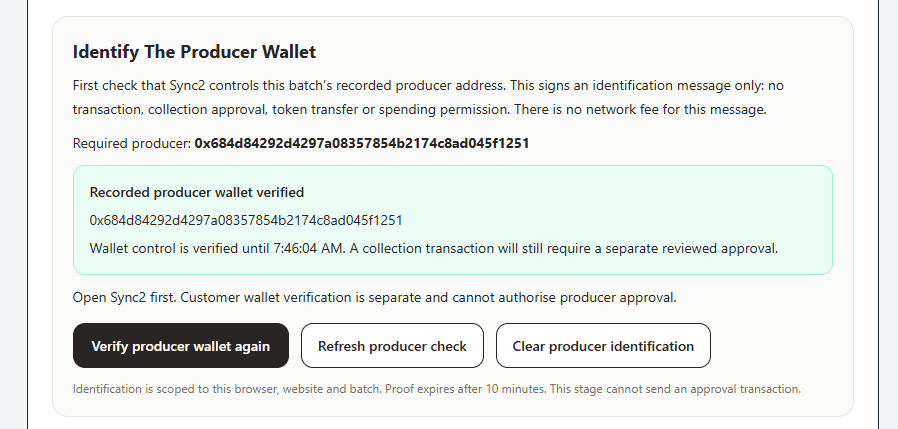
Verify the recorded producer wallet with Sync2 before collection approval.
View screenshot · Wallet verified
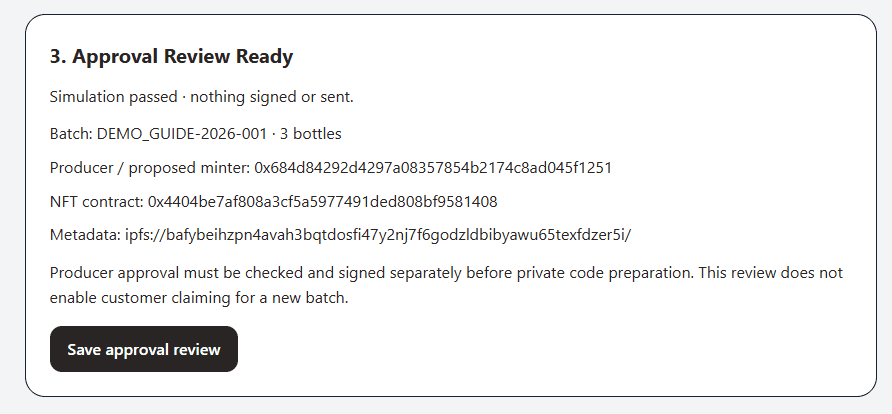
Check the batch, quantity, proposed minter and metadata in the unsigned review.
View screenshot · Unsigned review
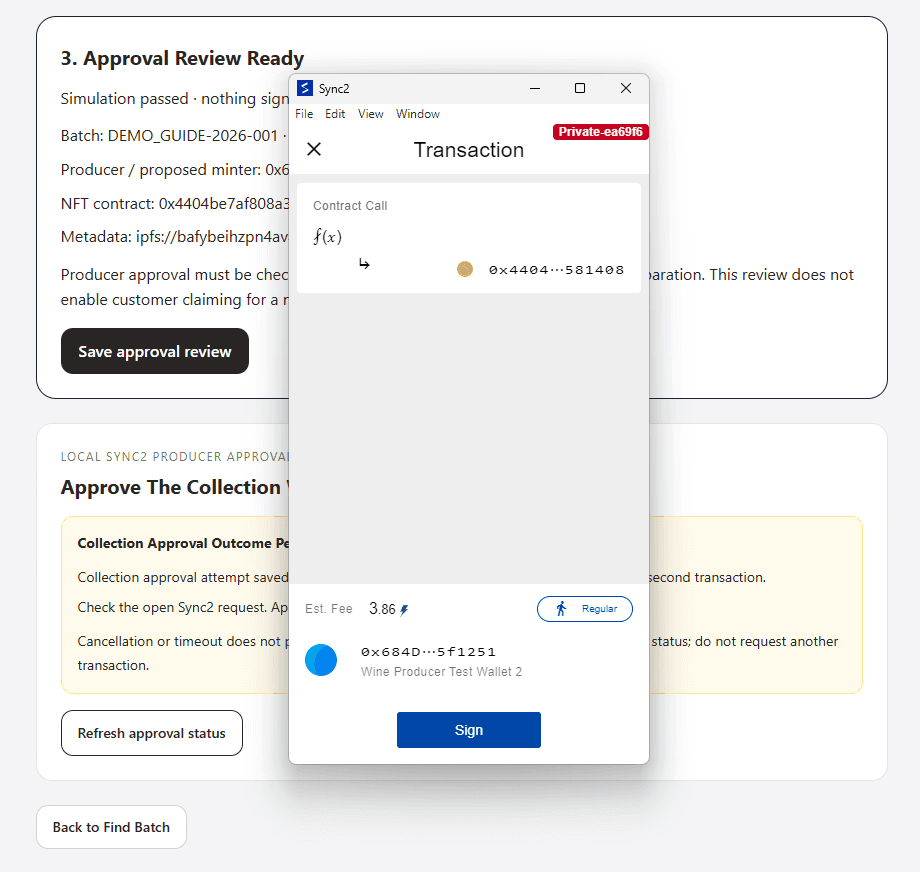
Check the network, producer wallet and estimated fee in Sync2 before signing once.
View screenshot · Sync2 prompt
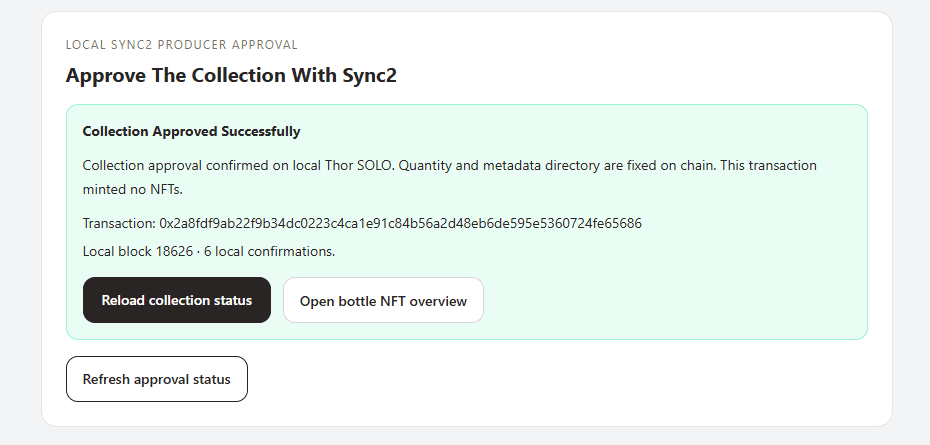
After approval is confirmed, open the bottle NFT overview.
View screenshot · Collection approved
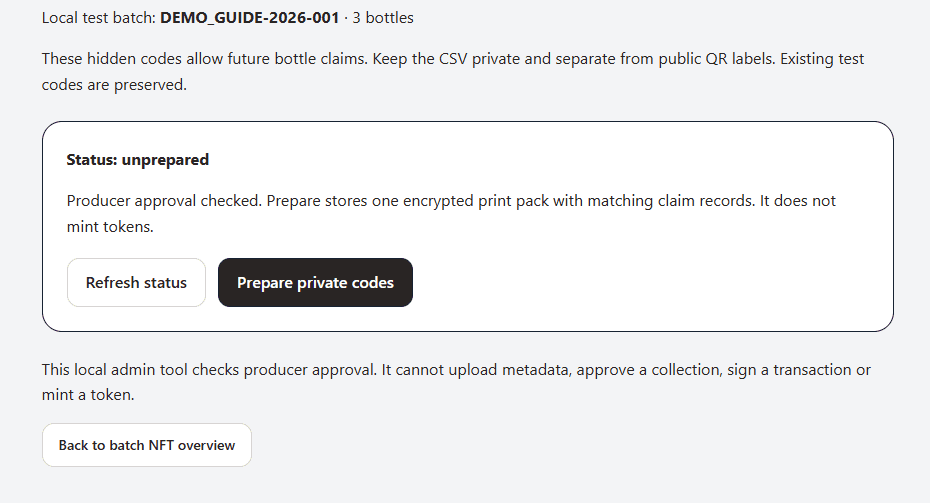
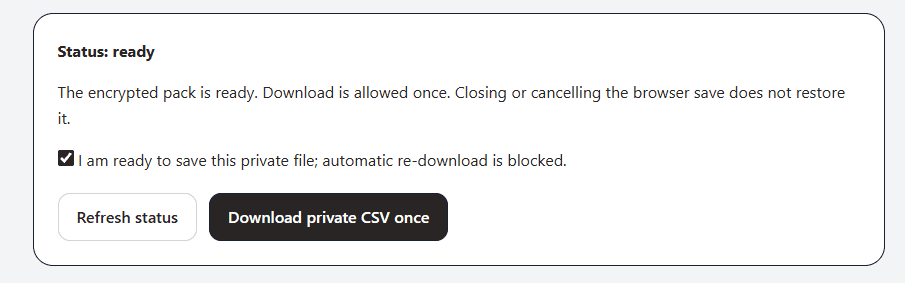
- Open Private Codes and save the one-time CSV securely. Give each buyer only the hidden code for their bottle. Keep the codes separate from public QR labels and artwork.
View Step 4 Screenshots
Select Prepare private codes after collection approval.
View screenshot · Prepare codes
Download the CSV once when you are ready to store it securely.
View screenshot · One-time download
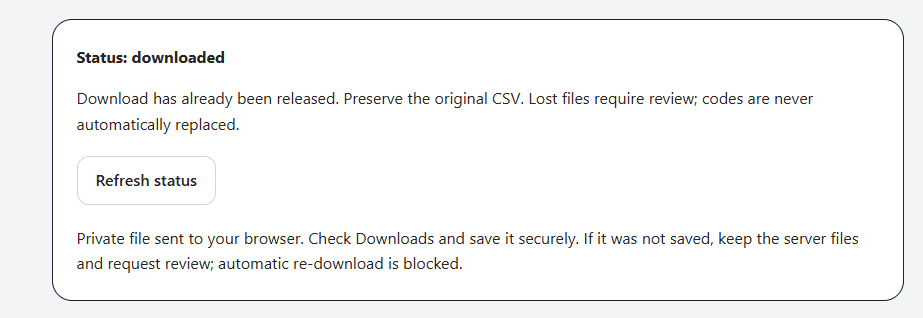
Check your Downloads folder and preserve the original CSV securely.
View screenshot · Download released
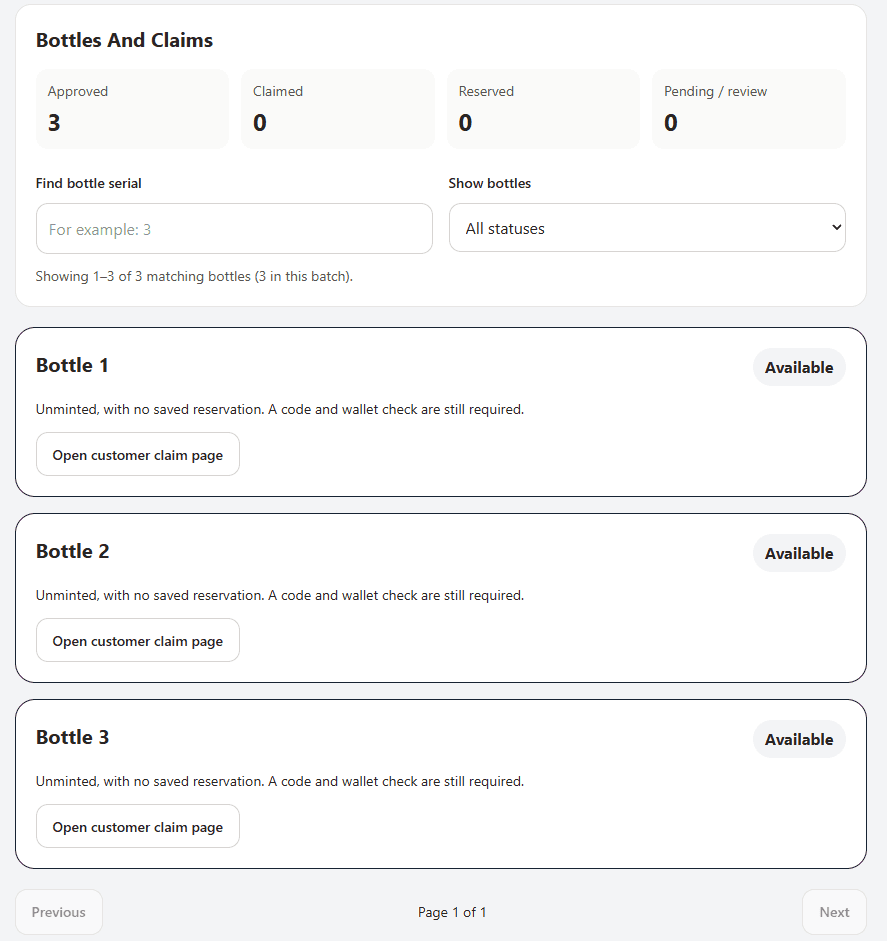
- The customer verifies their wallet, checks the matching code and reserves the bottle. Open Bottle Status, find the reserved serial and review its mint with Sync2. Confirm the recipient before signing. If the mint is pending, check the same transaction until it confirms. The customer can then view the collectible and receipt on the claim page.
View Step 5 Screenshots
Choose All statuses and open the customer claim page for the matching serial.
View screenshot · Find Bottle 1
Preview the claim page on mobile. This local walkthrough uses desktop Sync2 for verification.
View screenshot · Mobile claim preview
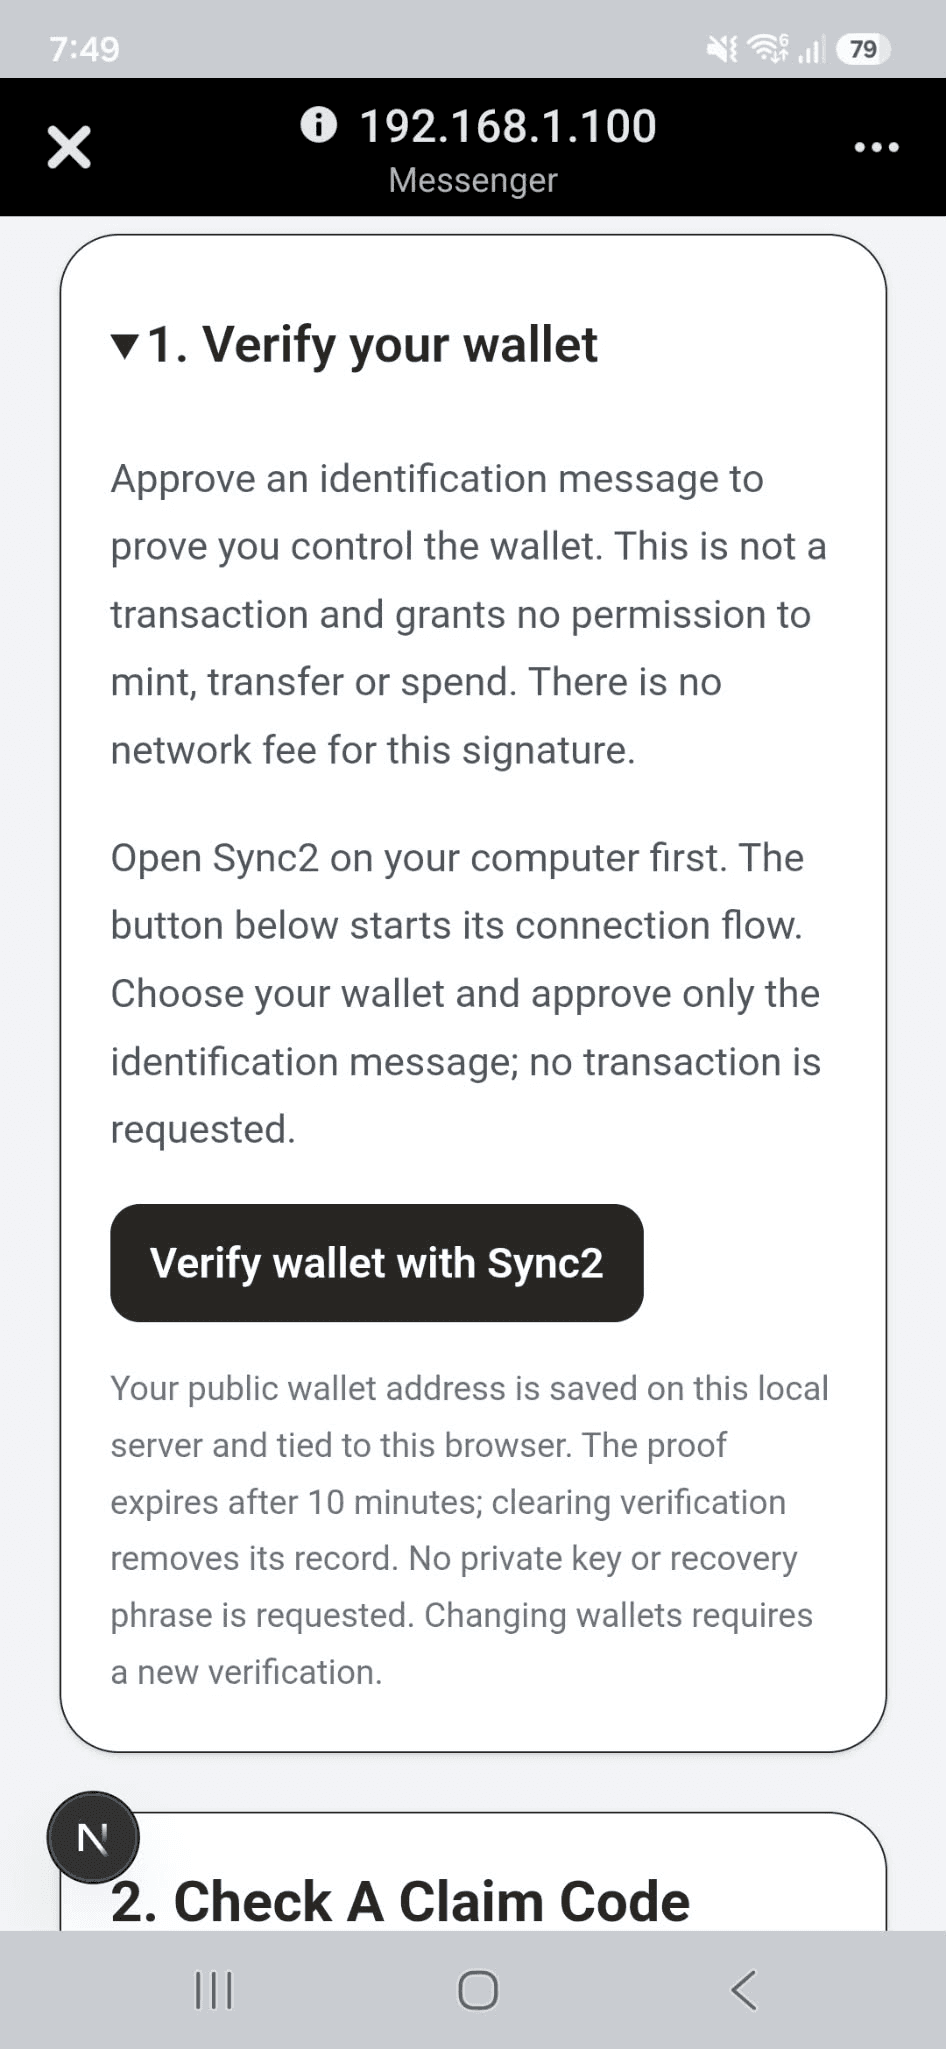
Check that the verified address belongs to the intended customer wallet.
View screenshot · Customer wallet verified
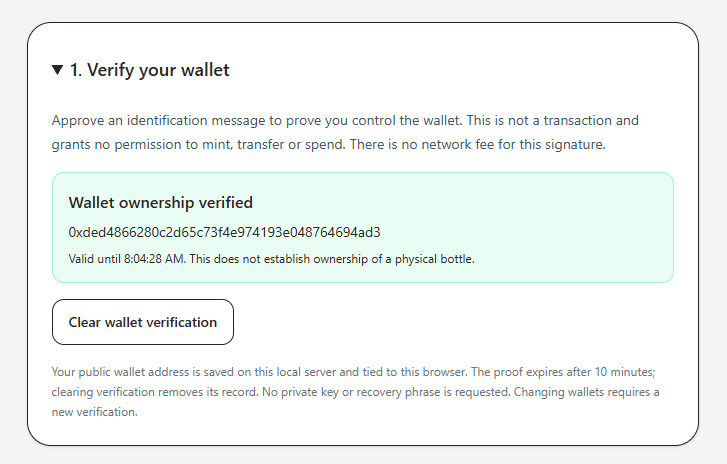
Check the code for the matching bottle, then confirm the wallet before reserving it.
View screenshot · Code matched
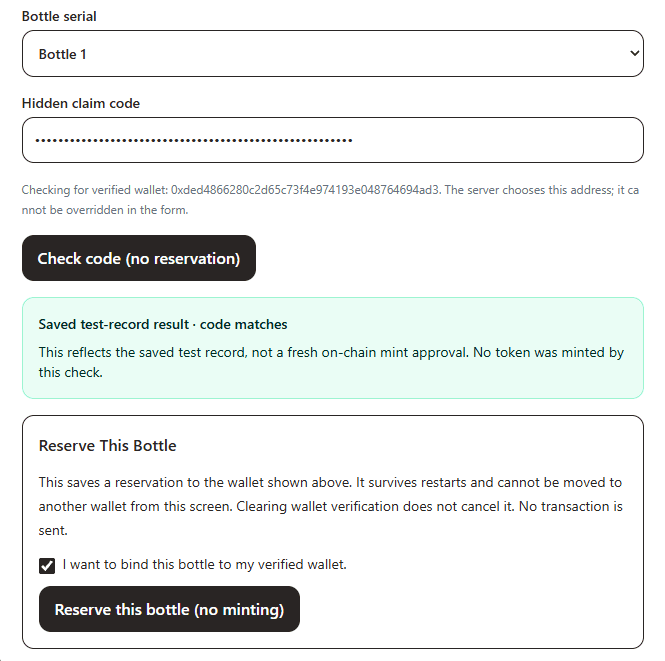
Confirm that the result says Reserved to your wallet before continuing.
View screenshot · Reservation saved
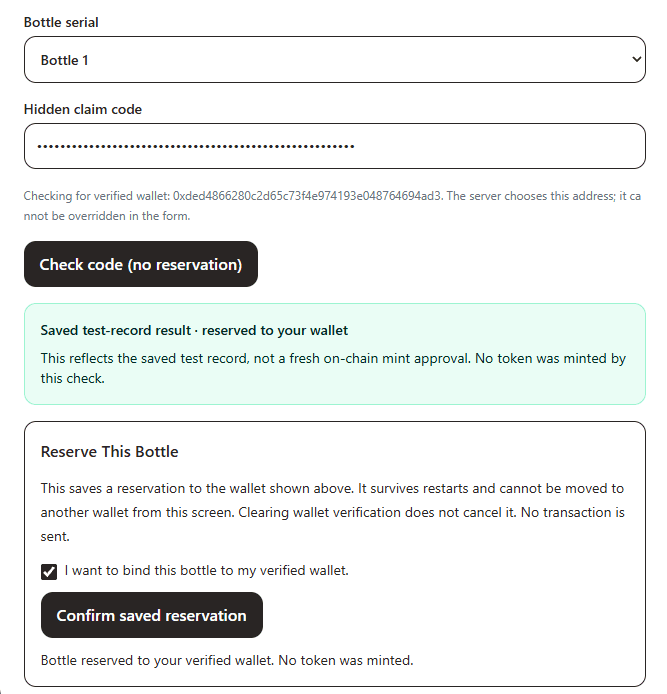
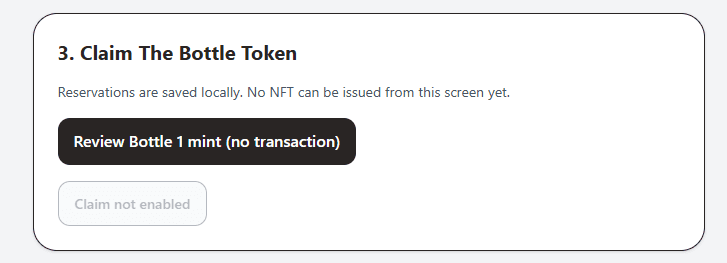
Select Review Bottle 1 mint (no transaction) to preview the proposal.
View screenshot · Mint review button
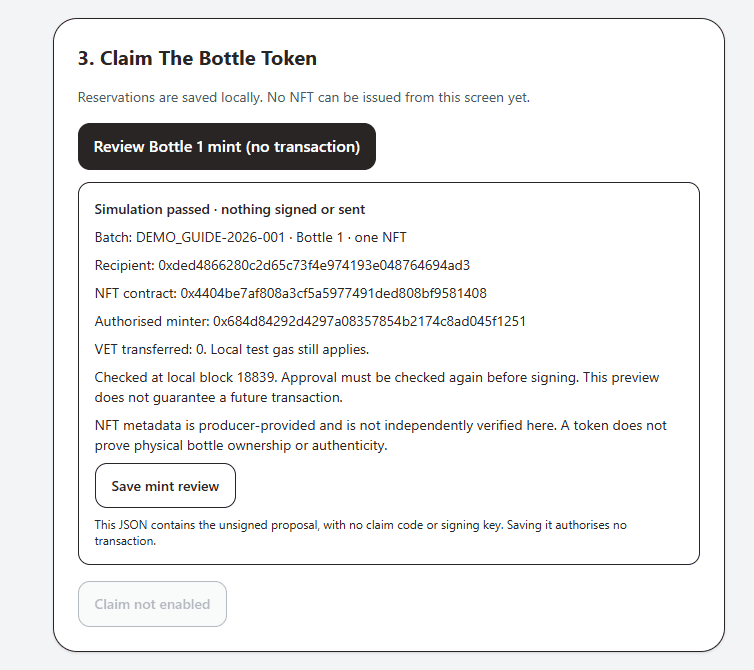
Check the recipient and bottle serial in the successful customer-side simulation.
View screenshot · Customer mint simulation passed
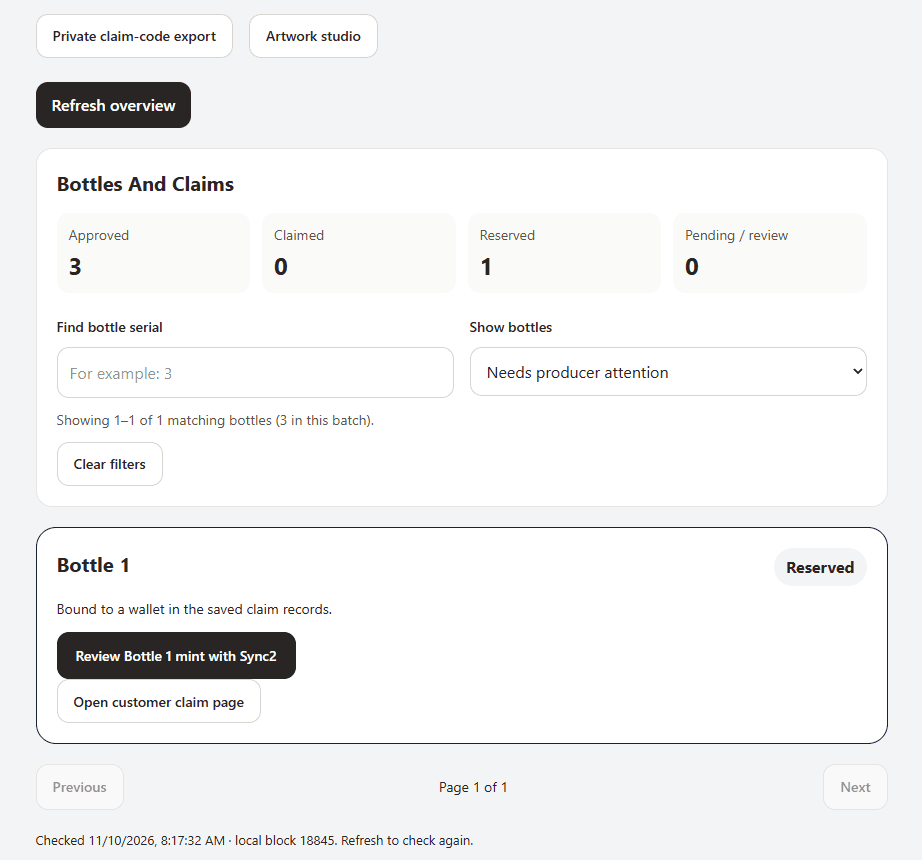
Under Needs producer attention, select Review Bottle 1 mint with Sync2.
View screenshot · Find the reserved bottle under Needs producer attention
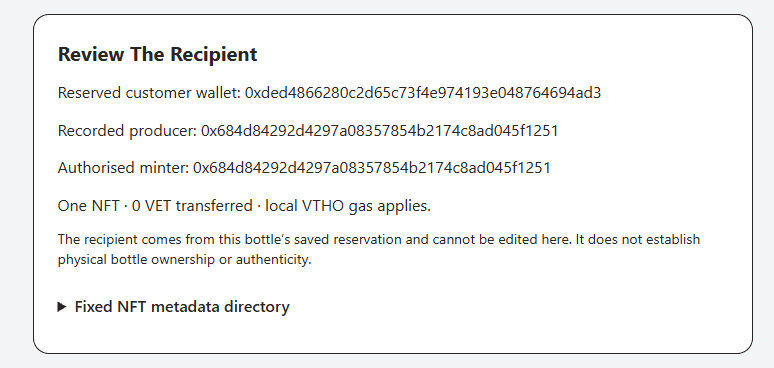
Confirm the saved recipient matches the verified customer wallet.
View screenshot · Review the reserved recipient
Verify the producer wallet if prompted, then run the fresh mint check.
View screenshot · Verify the producer wallet before a fresh mint review
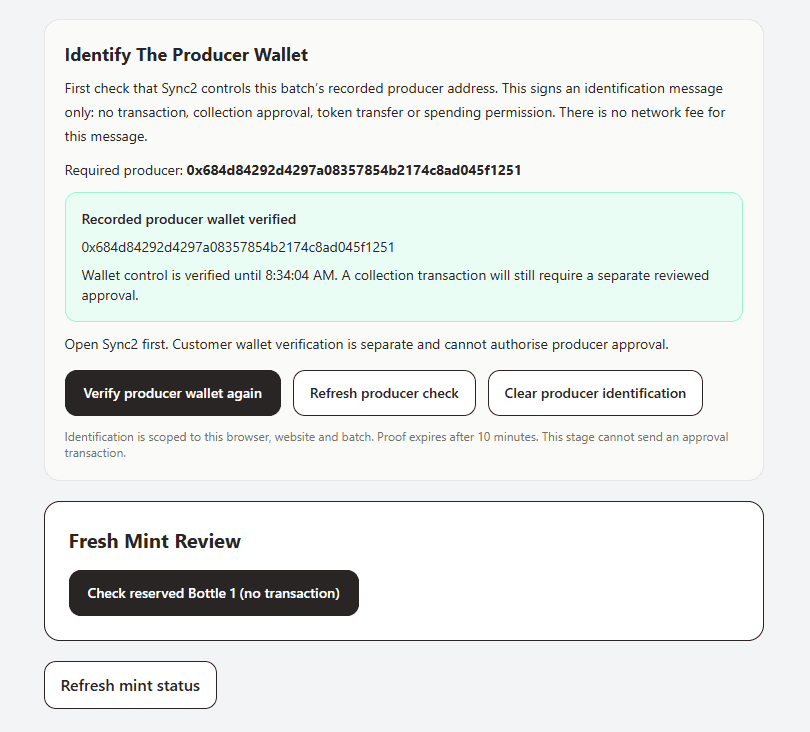
Select Check reserved Bottle 1 (no transaction). Once the simulation passes, confirm the recipient before ticking the approval box.
View screenshot · Fresh simulation passed before approval
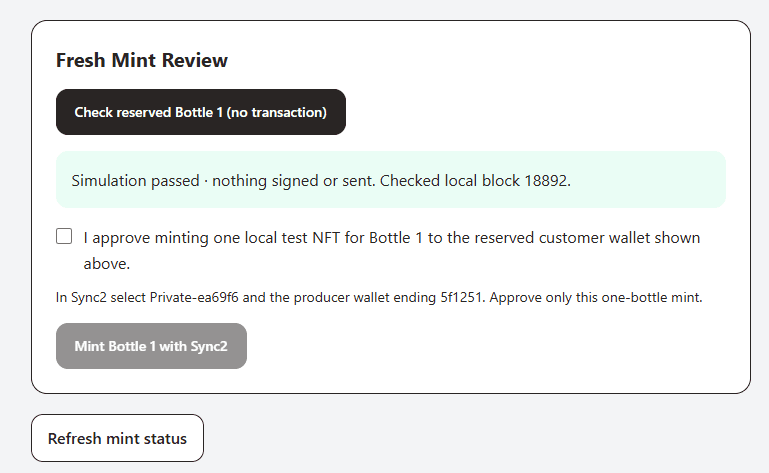
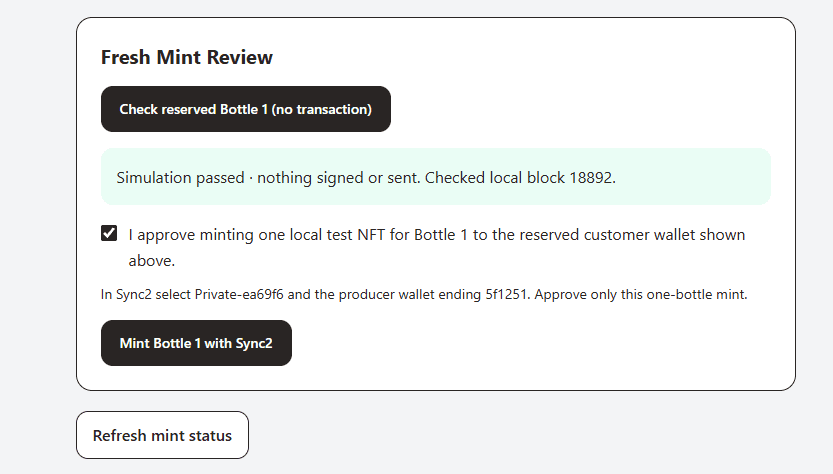
Tick the approval box and select Mint Bottle 1 with Sync2.
View screenshot · Confirm the one-bottle mint
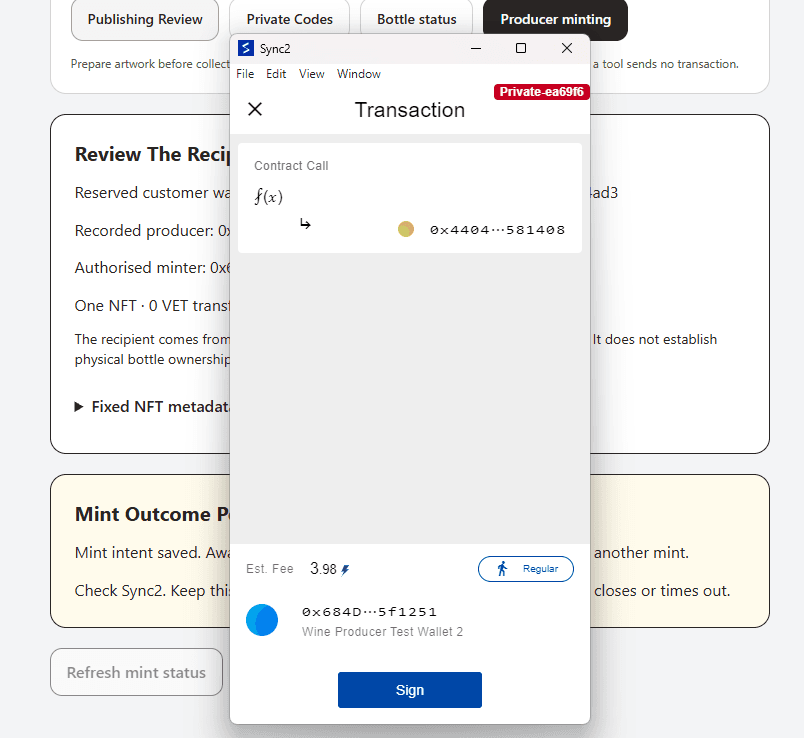
Check the network and producer wallet in Sync2, then sign once.
View screenshot · Sign the mint transaction in Sync2
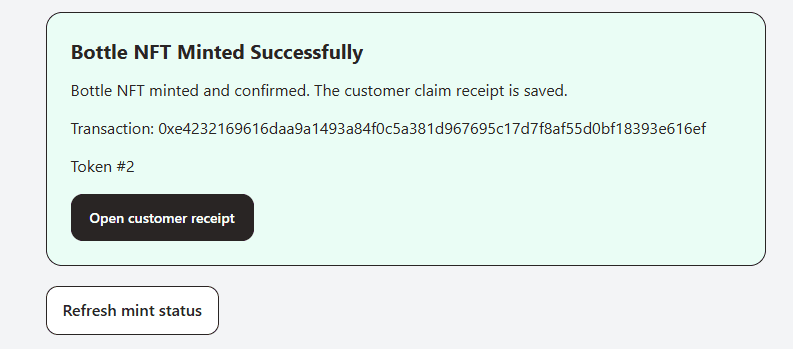
Wait for mint confirmation, then select Open customer receipt.
View screenshot · Mint confirmed as Token #2
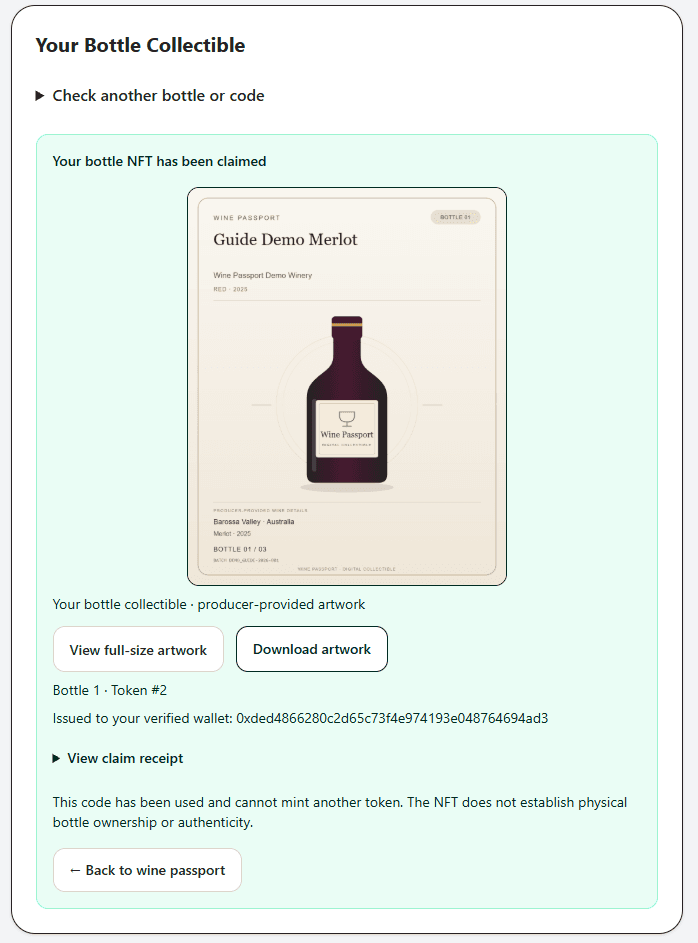
Check the bottle serial and token number, then expand View claim receipt for the transaction details.
View screenshot · Customer collectible with the claim receipt available
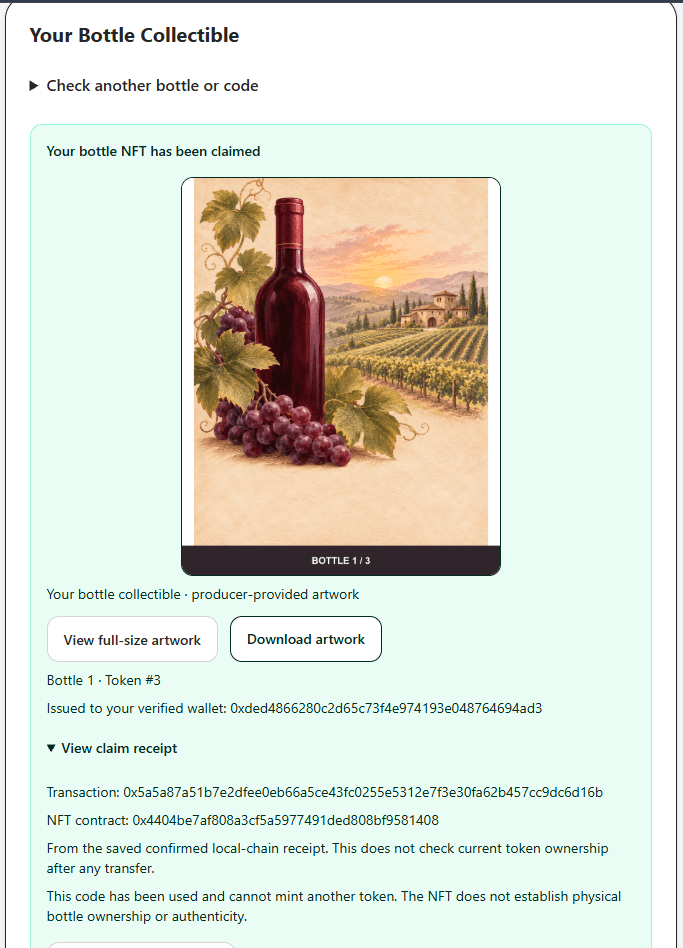
After the producer mint is confirmed, open the customer receipt. Check the custom artwork, Bottle 1 / 3, token number and intended recipient. This local example issued Token #3. Expand View Claim Receipt for the saved transaction. A saved receipt does not check current ownership after a transfer or prove physical bottle authenticity.
View screenshot · Check The Custom Artwork Claim Receipt
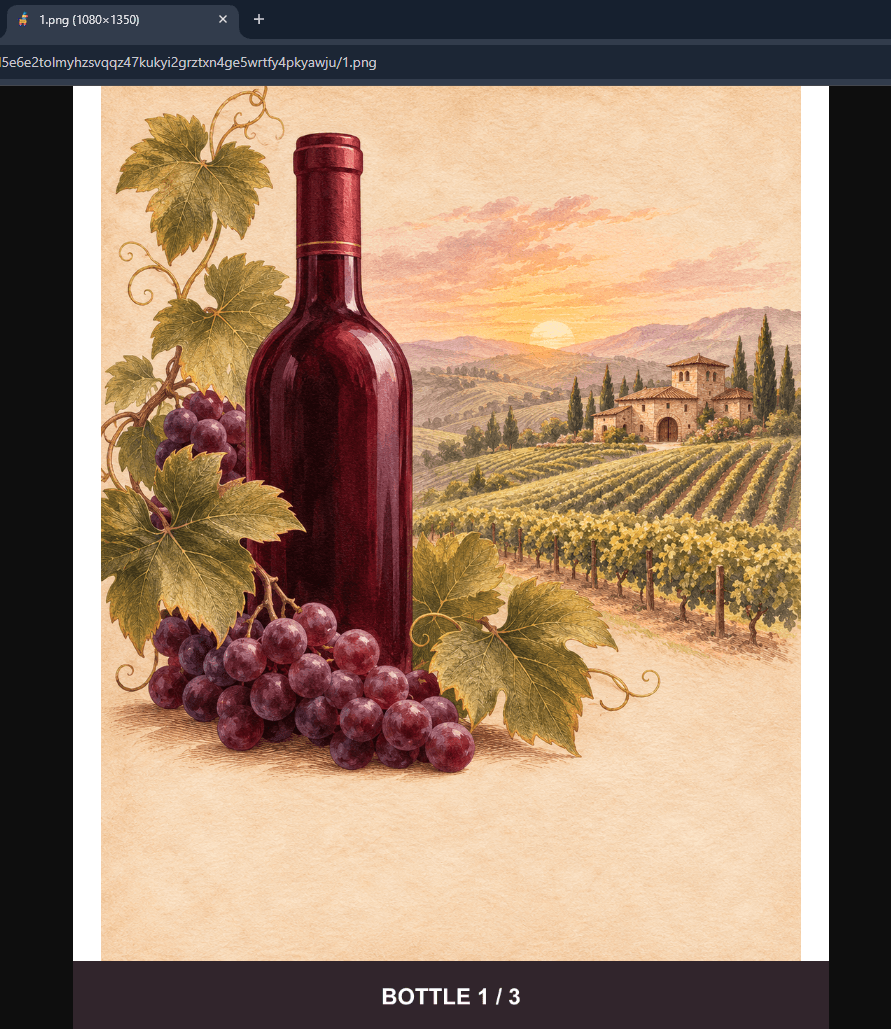
Select View Full-Size Artwork to inspect the published image and bottle number. Return to the receipt and select Download Artwork, then open the saved PNG. Both actions were checked successfully for this custom-artwork bottle. The screenshot shows the clean full-size view; the downloaded file matched it.
View screenshot · Open And Download The Custom Artwork
Custom artwork check, 15 November 2026: private save and reload, numbered ZIP export, verified publication of all three images and metadata pairs, collection approval, and Bottle 1 claiming completed for DEMO_CUSTOM-2026-001. The customer receipt showed Token #3 and the intended recipient. Full-size viewing and downloading the custom artwork were also checked successfully. The earlier generated-artwork screenshots illustrate the same separate approval and mint steps. If the unsigned mint review fails, keep the saved reservation. Check that Thor SOLO and Wine Passport are running, then open Bottle Status and retry the review for the reserved bottle. Wallet identification may need to be renewed.
Set Up Bottle Protection
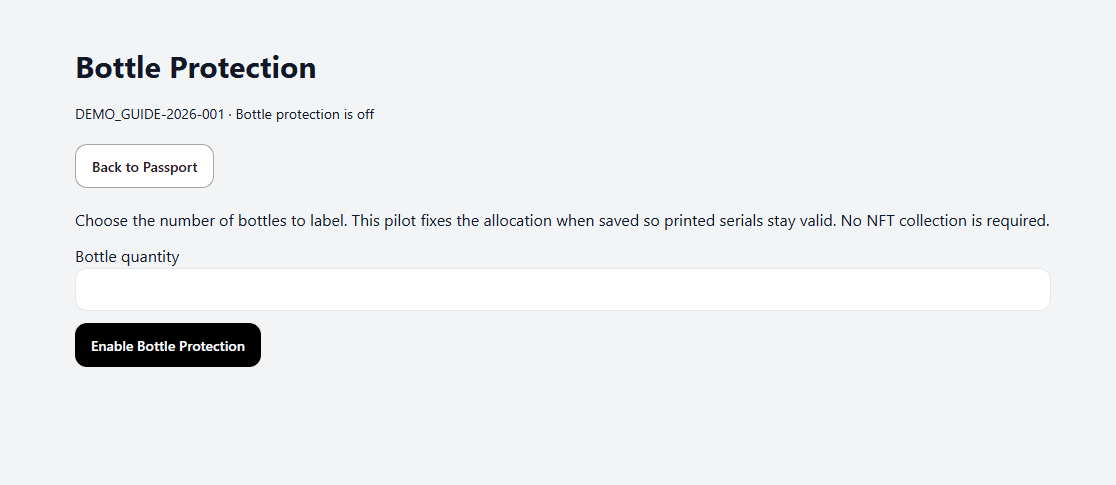
- On the verified passport, open Producer Label Tools and choose Set Up Bottle Protection. Enter the bottle quantity and select Enable Bottle Protection to save the serial allocation.
Choose the bottle quantity carefully: saving fixes the pilot serial allocation. This does not mint NFTs.
View screenshot · protection setup
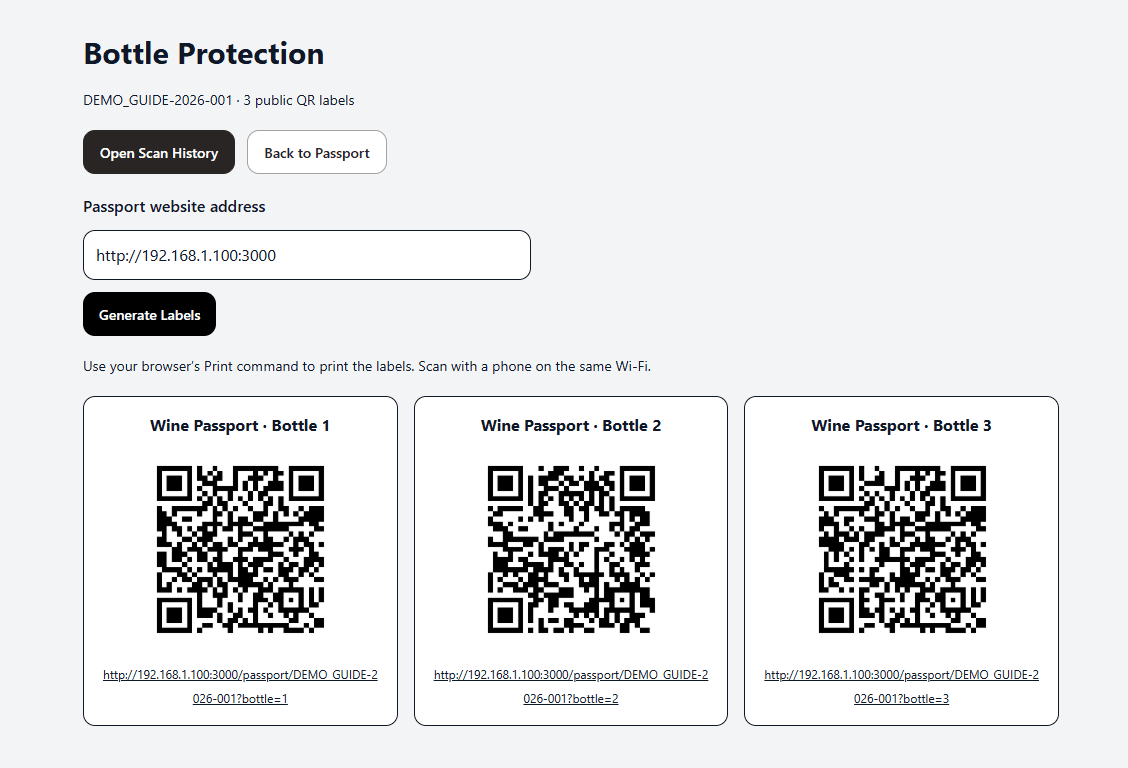
- Enter the passport website address and select Generate Labels. For a local phone test, use the computer’s Wi-Fi address and app port, and connect the phone to the same network. For labels going to customers, use the stable hosted passport address.
Enter the website address and select Generate Labels. Each public QR includes its own bottle serial.
View screenshot · protection labels
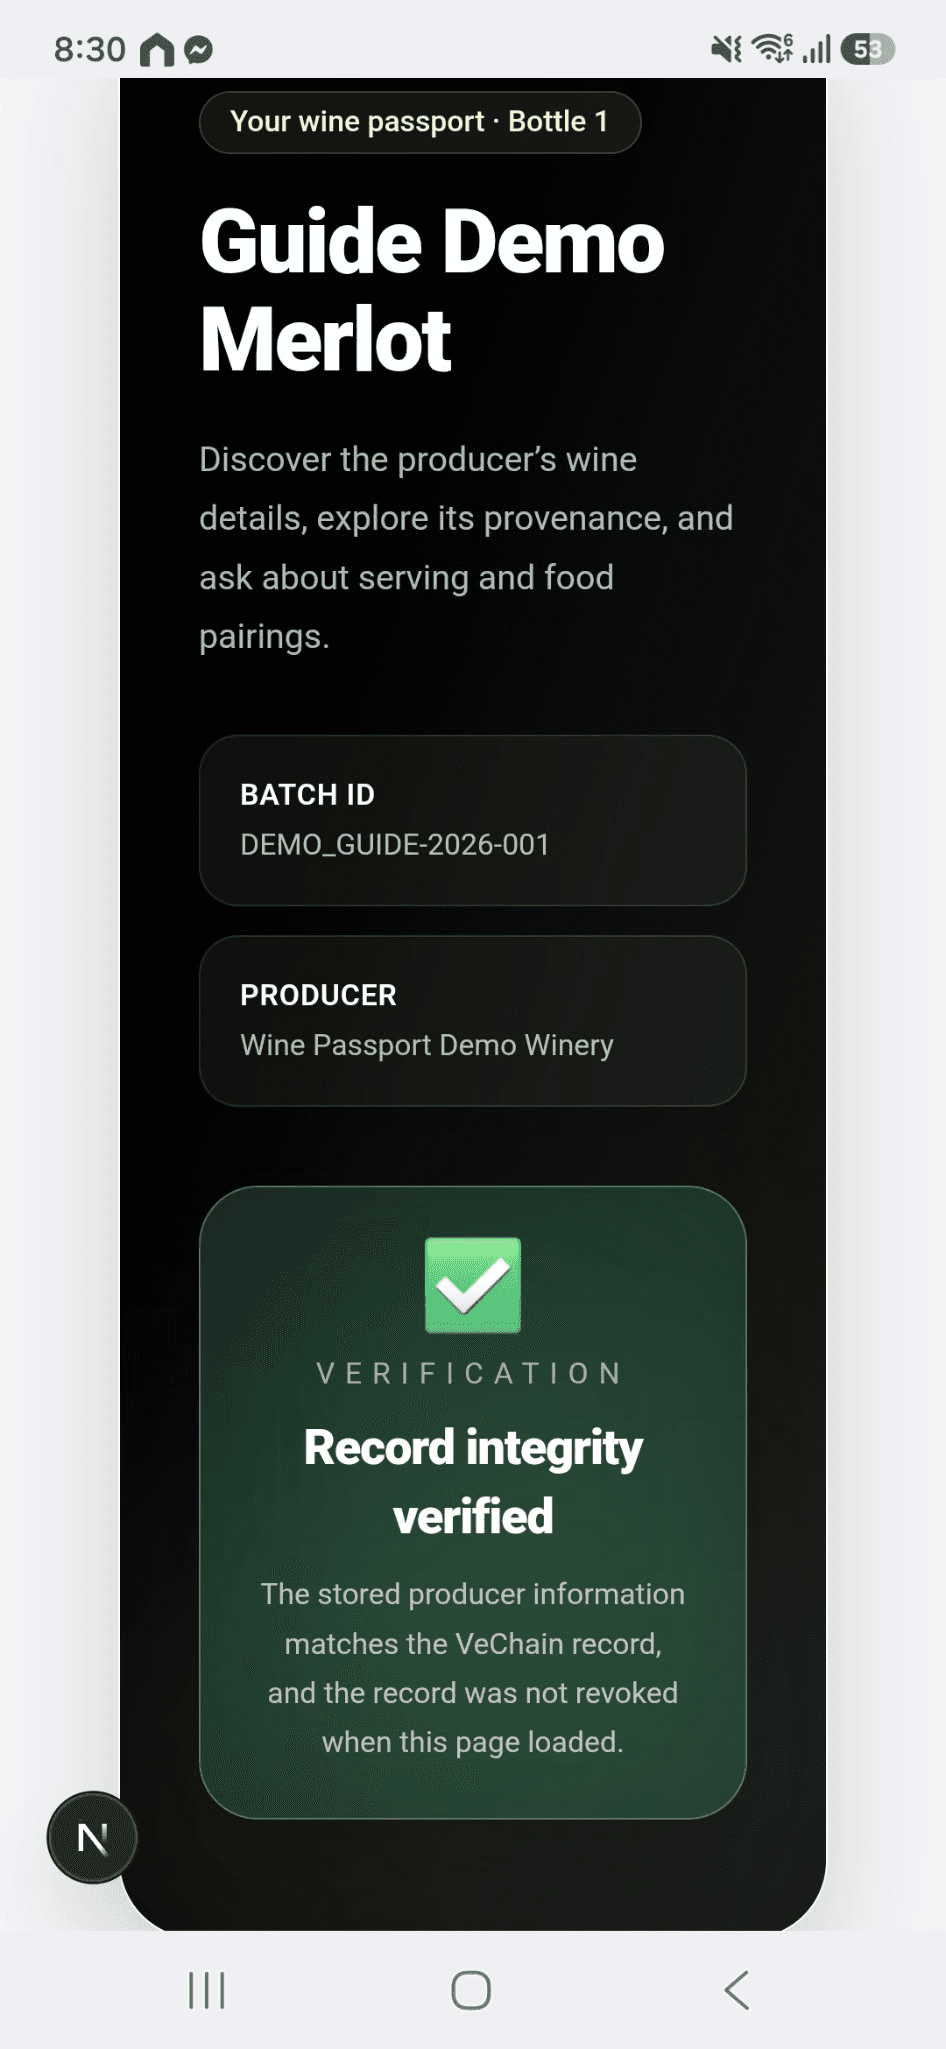
- Scan Bottle 1 and Bottle 2 directly from the screen before printing. Each QR should open the same batch passport with its own bottle serial. The ordinary batch QR opens the passport without an individual serial.
After scanning Bottle 1, check the batch name, ID and Bottle 1 heading.
View screenshot · protection mobile passport
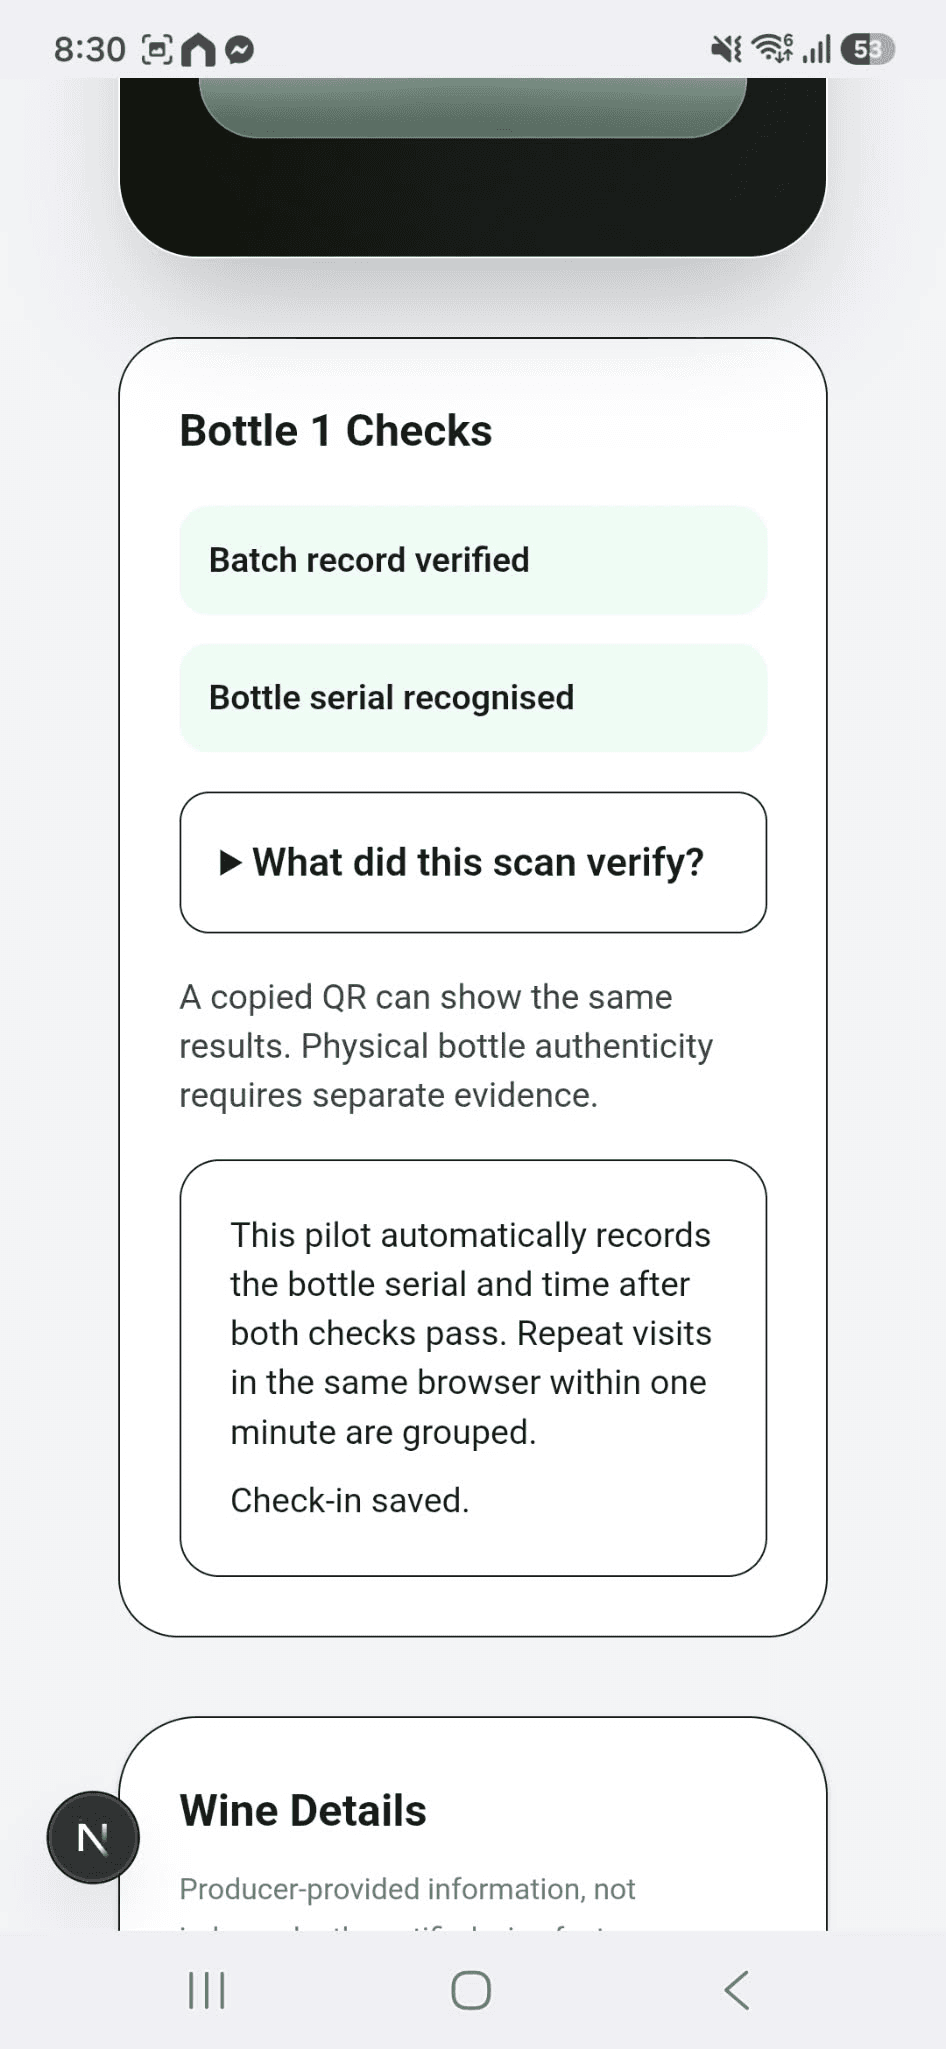
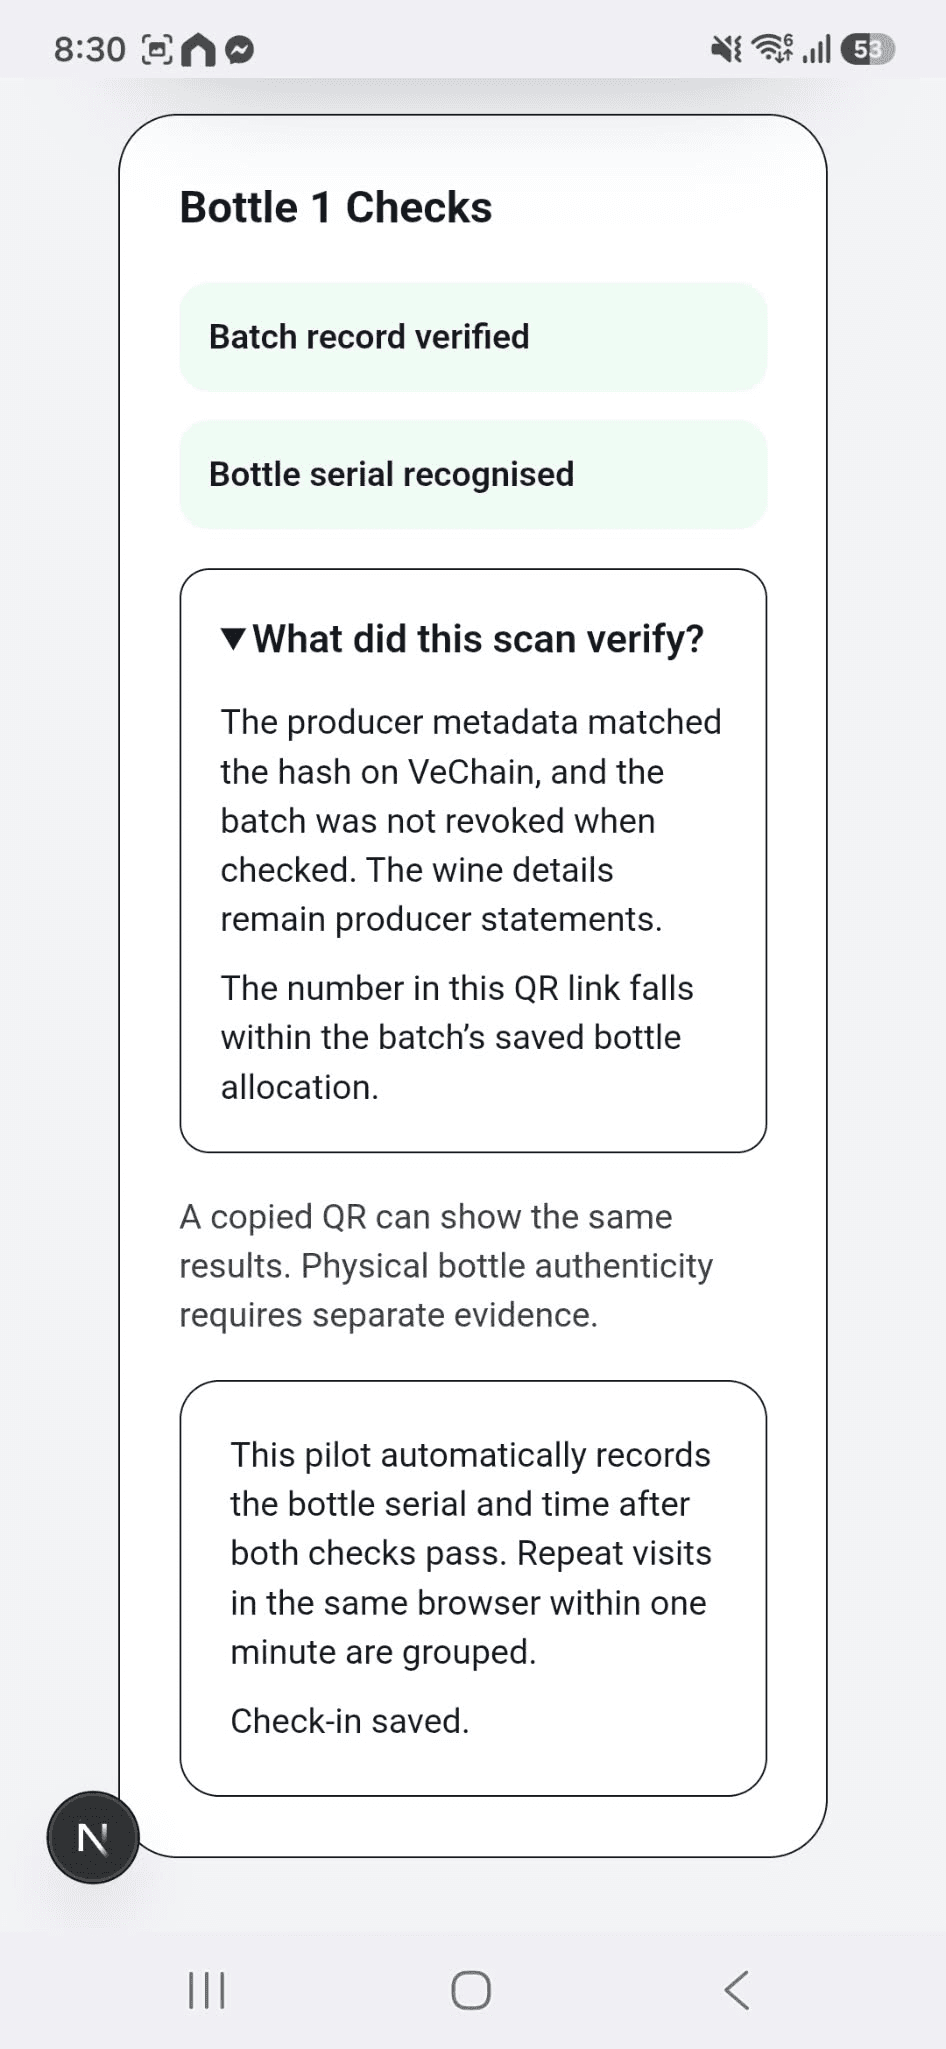
Read the batch integrity and bottle serial results separately. Check-in saved confirms the pilot recorded the visit.
View screenshot · protection mobile checks
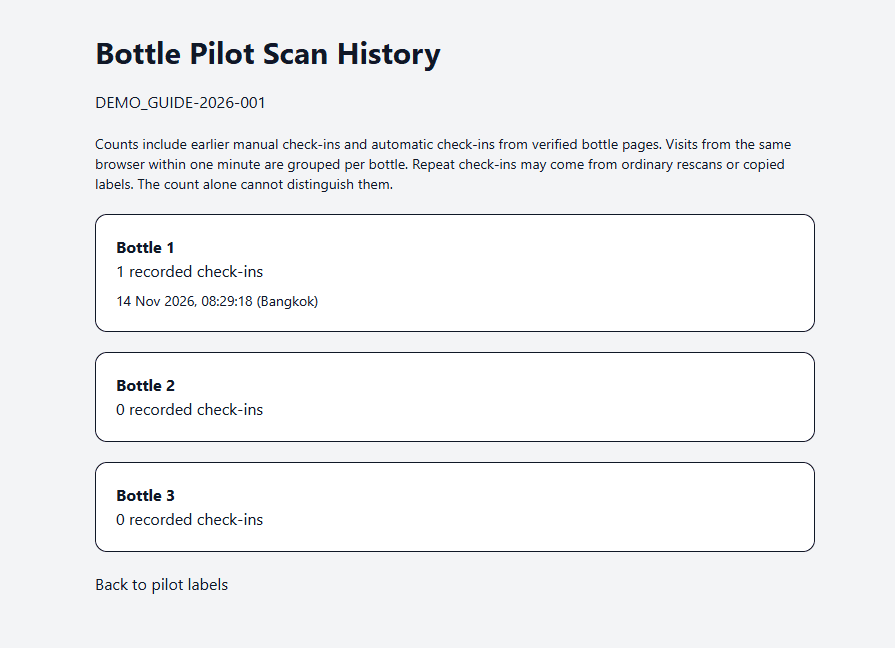
- Select Open Scan History to review recorded check-ins. Quick repeats in the same browser are grouped per bottle within one minute. Repeated check-ins can come from ordinary rescans or copied labels.
Open Scan History to see saved check-ins. Counts alone cannot identify copied labels.
View screenshot · protection history
- A recognised serial means it appears in the saved allocation. A copied QR can return the same result. Assess physical seals and other authenticity evidence separately.
Expand What did this scan verify? A recognised serial is not proof of physical authenticity.
View screenshot · protection explanation
Pilot status: Bottle 1 recognition and a saved check-in were observed on 14 November 2026. Physical seal application, removal, resealing and real printed-label durability remain untested. Do not describe this pilot as proof that a bottle is genuine. NFT claiming is optional and separate.